Hockney inspired pictures
|

|
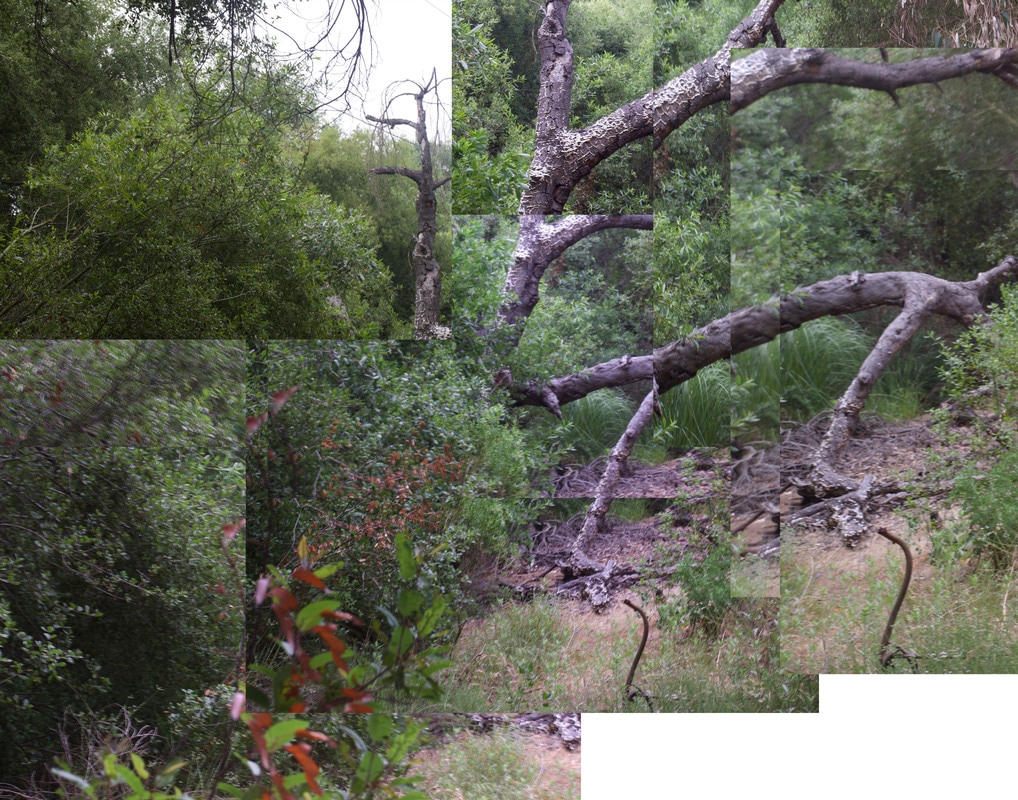
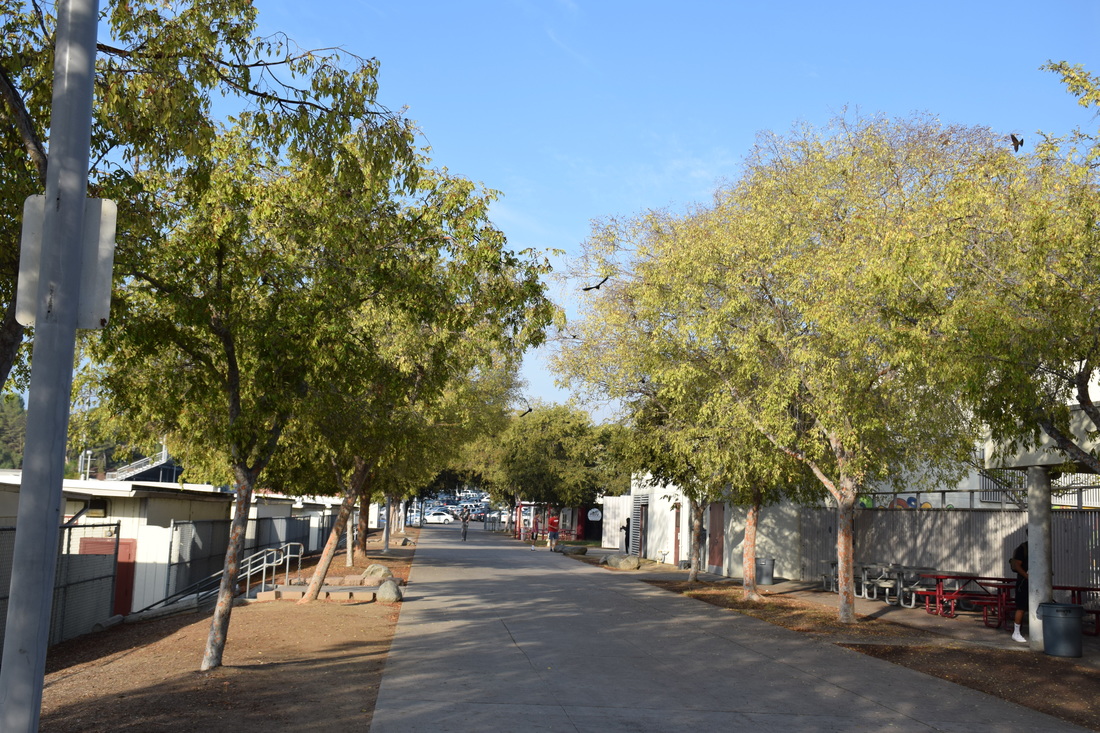
David Hockney was born July 9 1937 in Bradford United Kingdom.He is a english painter, draughtsman, printmaker, stage designer, and photographer. he is known for his modern art, pop art and his collage photographs. His photos are basically a bunch of polorids together to make a huge picture. I made two picture inspired by him. I too 12 or more pictures of the same scence but different section and i use photoshop to put them together and adjust brightness/contrast. the on on the left is rule of thirds and the right one is leading line.
Vogue Magazine Cover
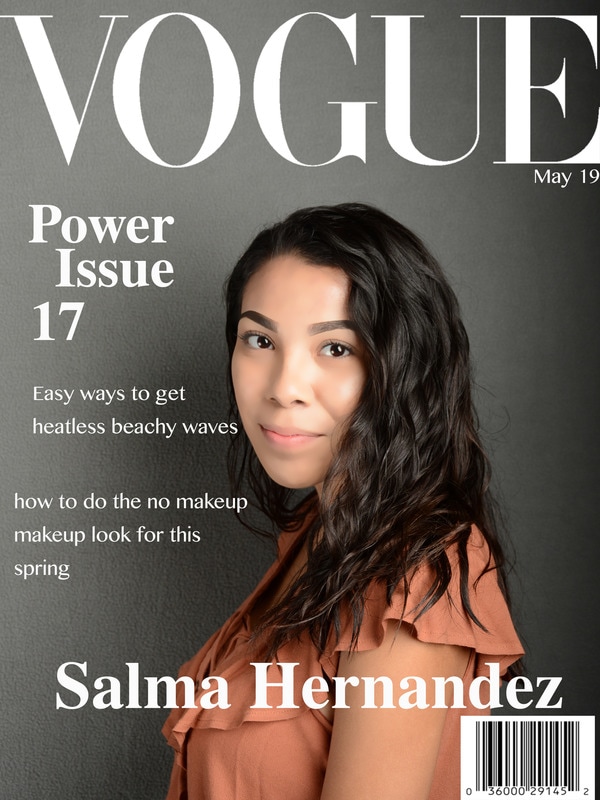
I chose to do the vogue magazine because I love it and I read them whenever I get them. To emulate the magazine cover I made sure I picked a picture where I was looking straight in the camera and I put my name on the bottom, I put a couple captions on the side and I even put a bar code to make it look more realistic. I couldn't get in exact font for the vogue title so I got a picture off google. A strobe light is a device used to produce regular flashes of light.
Family photography
Delmar photo
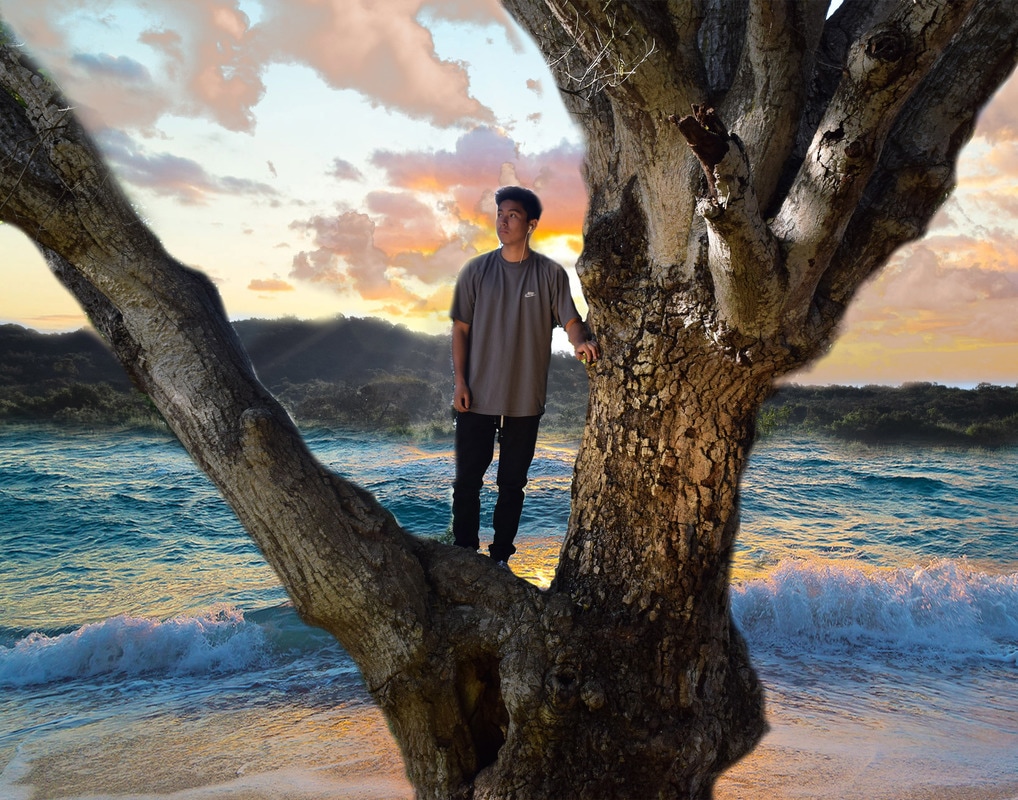
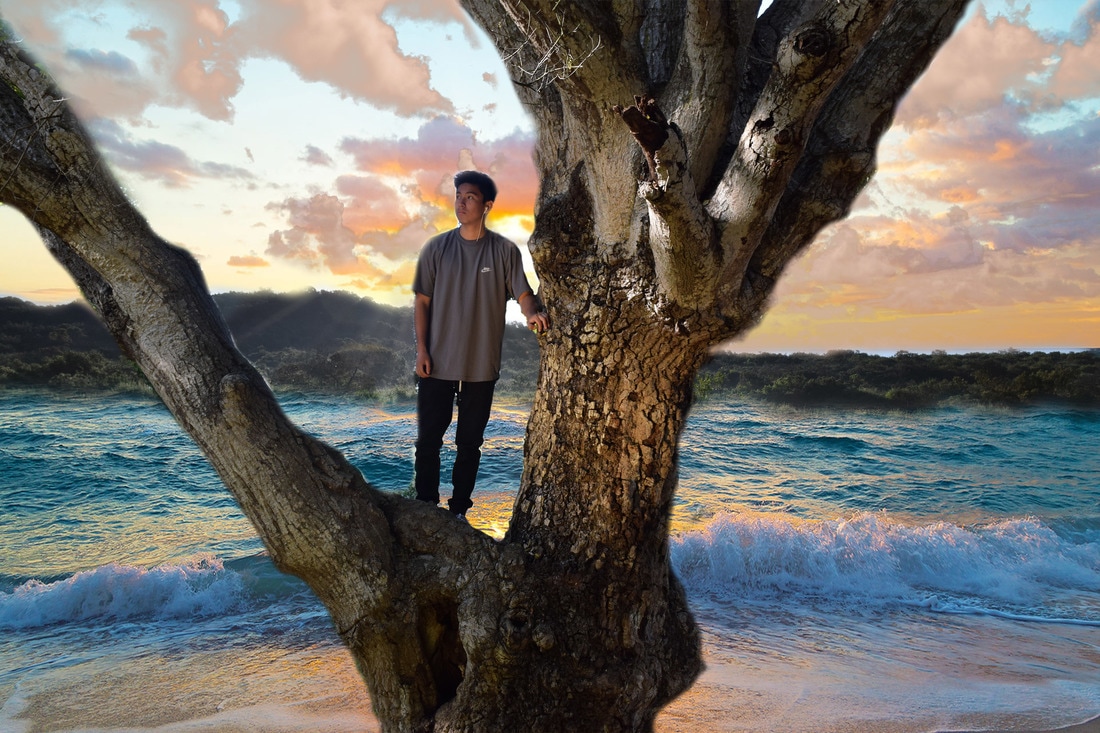
This is a photo is made up of 4 photos that I photoshopped together to make
it looks like I wanted it to. The first picture, which is the main background, is a field
of wild flowers and the sun in the sky. Then from another picture I cropped out the
tree and the boy on top of the tree and put in roughly in the middle. After that I add
the beach sky and the bottom of the ocean of the same beach picture and make in
more light bright blue and the sky a more bright peachy pink. I wanted more clouds In my picture and added a cloud picture and made them a similar color to the clouds
that was with the original beach sky. Finally I merged the layers together and that
Is the final product? I named this picture Venice waves because this picture goes
with the song Venice waves by Phora. The part of the song that influenced this is
“I’ll leave, but I’ll always come back just like the Venice waves feel the breeze in the
air yeah I miss you, it’s clear to be honest, I just wish you were here.” So I mean him
look like if he was wait for his girl to come back to him because he still loved her
even if the have their differences.
Lightroom filters
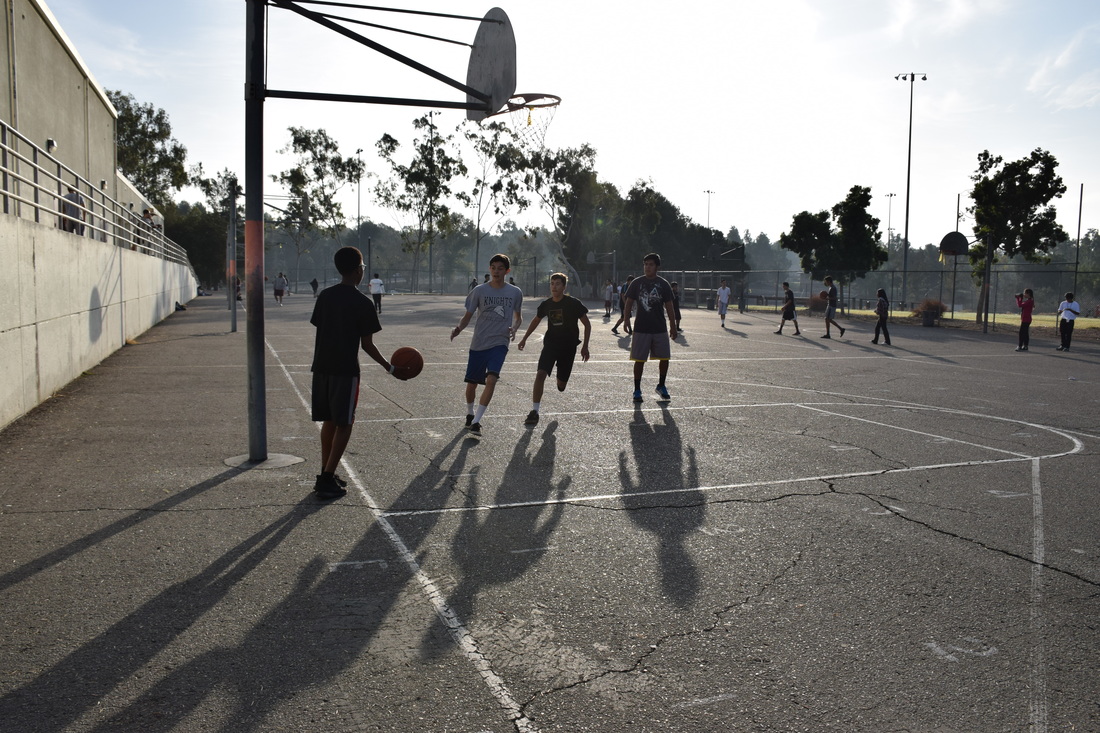
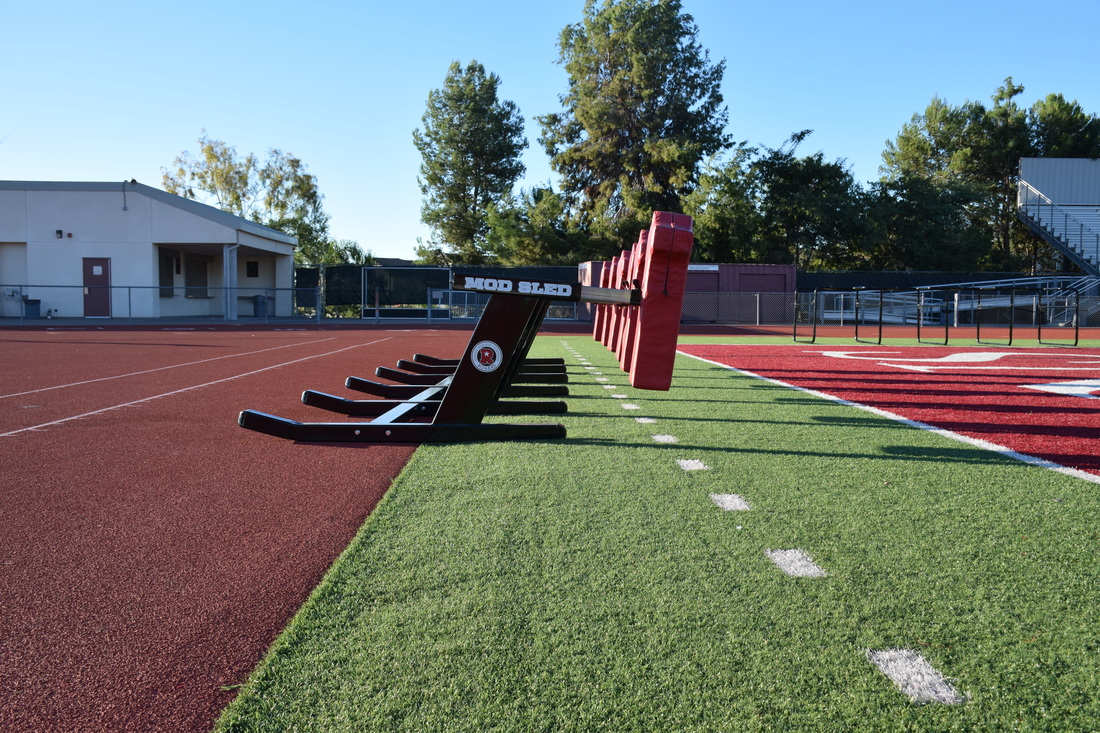
Sport Photography
Mood photography
Composite project
This is a photo is made up of 4 photos that I photoshopped together to make
it looks like I wanted it to. The first picture, which is the main background, is a field
of wild flowers and the sun in the sky. Then from another picture I cropped out the
tree and the boy on top of the tree and put in roughly in the middle. After that I add
the beach sky and the bottom of the ocean of the same beach picture and make in
more light bright blue and the sky a more bright peachy pink. I wanted more clouds In my picture and added a cloud picture and made them a similar color to the clouds
that was with the original beach sky. Finally I merged the layers together and that
Is the final product? I named this picture Venice waves because this picture goes
with the song Venice waves by Phora. The part of the song that influenced this is
“I’ll leave, but I’ll always come back just like the Venice waves feel the breeze in the
air yeah I miss you, it’s clear to be honest, I just wish you were here.” So I mean him
look like if he was wait for his girl to come back to him because he still loved her
even if the have their differences.
it looks like I wanted it to. The first picture, which is the main background, is a field
of wild flowers and the sun in the sky. Then from another picture I cropped out the
tree and the boy on top of the tree and put in roughly in the middle. After that I add
the beach sky and the bottom of the ocean of the same beach picture and make in
more light bright blue and the sky a more bright peachy pink. I wanted more clouds In my picture and added a cloud picture and made them a similar color to the clouds
that was with the original beach sky. Finally I merged the layers together and that
Is the final product? I named this picture Venice waves because this picture goes
with the song Venice waves by Phora. The part of the song that influenced this is
“I’ll leave, but I’ll always come back just like the Venice waves feel the breeze in the
air yeah I miss you, it’s clear to be honest, I just wish you were here.” So I mean him
look like if he was wait for his girl to come back to him because he still loved her
even if the have their differences.
Invisible Man
Mandalas
mandalas are a up close picture that you edit on photoshop and duplicate multiple times and rotate then in different directions until you see a geometric pattern. I used photoshop and i had a template made for me and i selected a piece of the circle and dragged it on to my photo and coped and past it on the templet and then i depilated it and flipped it horizontally and rotated until it fit perfectly next to the first one and repeat. my favorite is the on with the bee i really like how it turned out. I was hard to do the challenge ones because they had morse smaller triangles and i was harder to fit them perfectly.
Tessellations
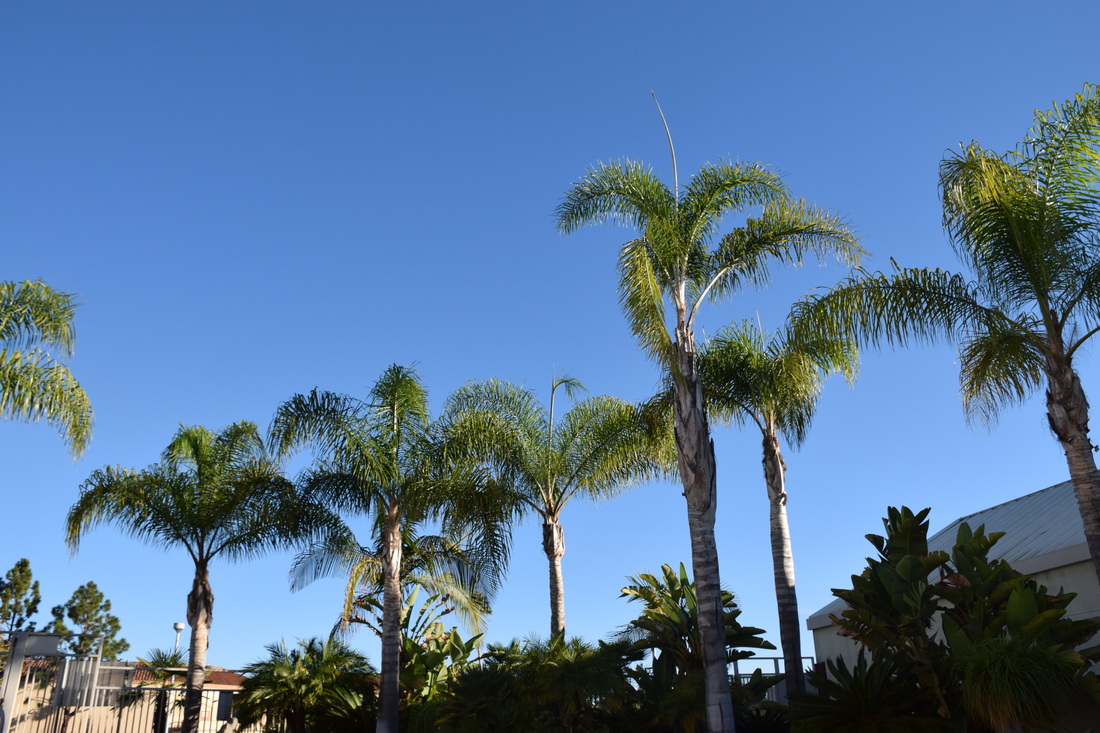
Tessellations are a zoomed in picture of something and copied several time and rotated in different directions to make geometric pattern. I went to photoshop and i cropped in to a picture i wanted to the size i needed and i then i made a templet and made it the size as my picture and i copied and rotated my picture and repeat until done. i like the palm tree branch thats in 4''. i struggled with the 1'' because i kept on getting confused and it made my head hurt.
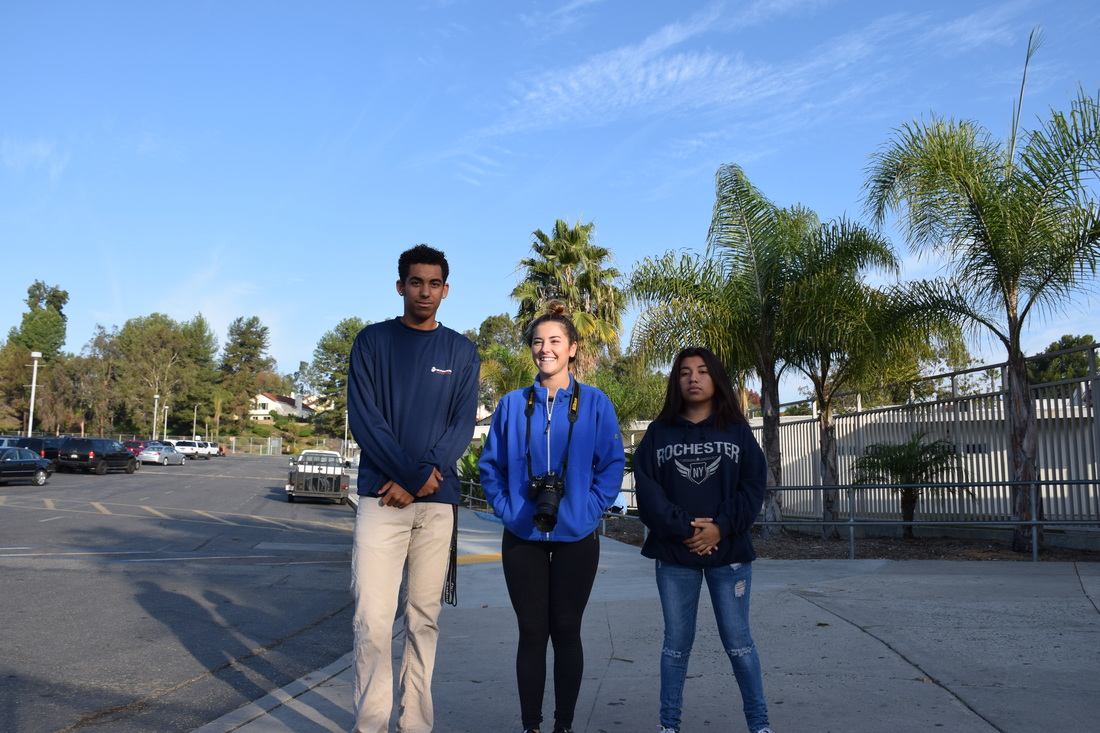
Portrait
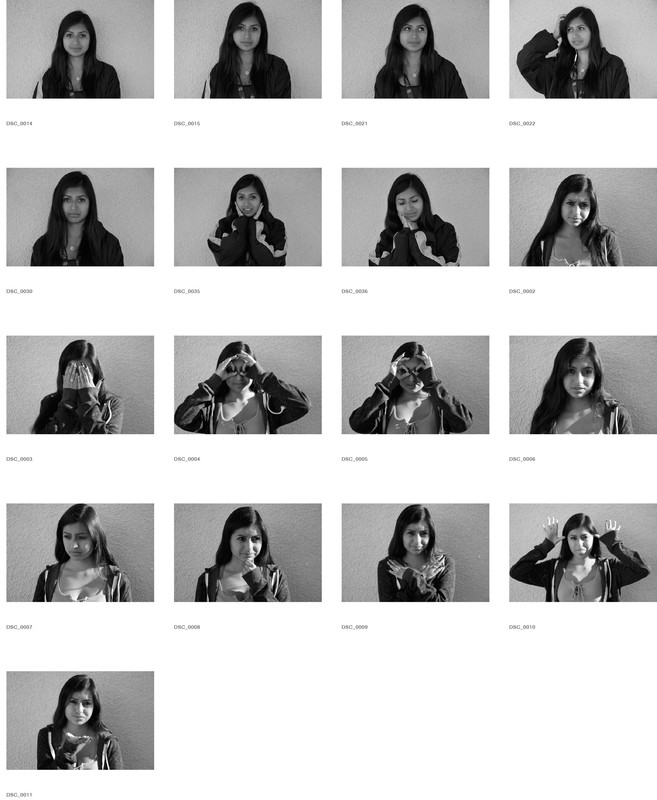
I learned that lighting is very important in portrait photography as well as the background because you don't want people walking behind or a trash can. My group and I just picked poses for the sheet we were comfortable doing. we used the reflector a lot because we like that warm tome it gave us since we were taking picture in dark areas we needed the extra light . I used photoshop to retouch my picture i just removed some imperfections and made the skin more smooth.
Food photography
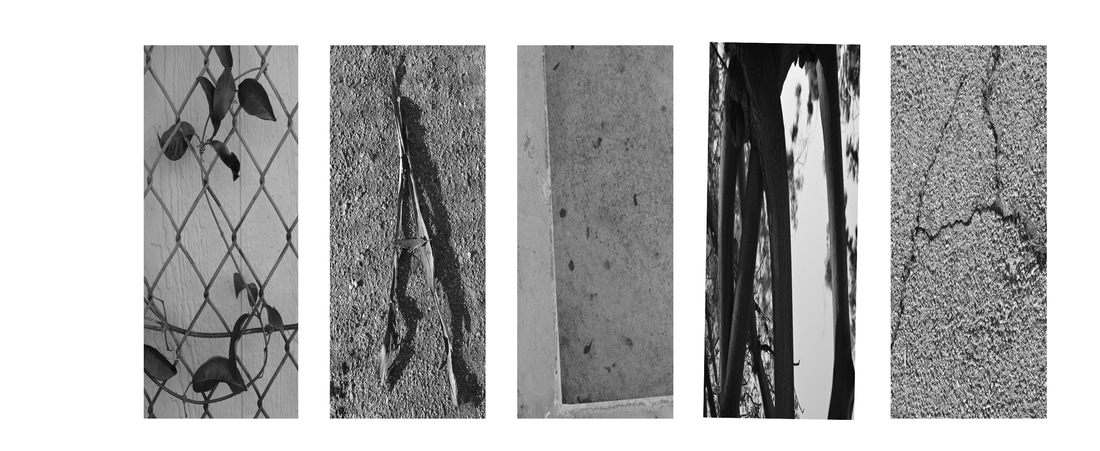
This project is called the name project and what you have to do is go outside and find things in nature that look like letters in your name and i joined them together using photoshop. I was kind of hard to find some letters but i eventually found them. I like how sit turned out especially the "S".
|

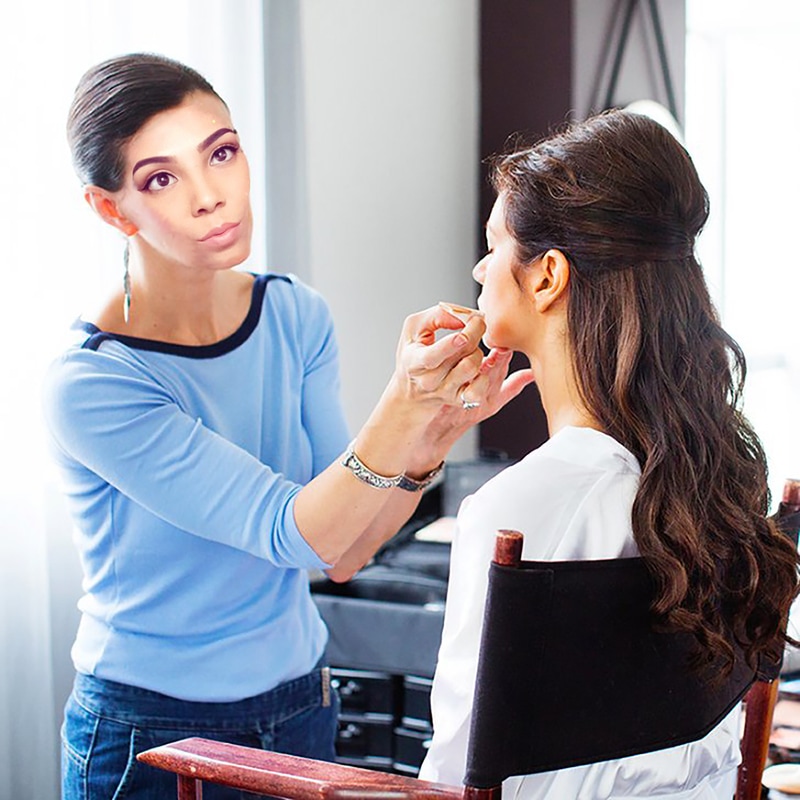
this is a picture of me and my boyfriend drake. I chose him because i love him and and his music. As a career I picked a cosmetologist because i enjoy doing makeup and hair.
|
Alice Gao photographer
Photographing the moon
Blood Moon Lunar Eclipse, September 27, 2015. Left image: 70-300mm lens @ 270mm, ISO 1000, aperture f/5.3, shutter speed 1.3 secs. Right image: 70-300mm lens @ 300mm, ISO 800, aperture f/13, shutter speed 1/1250 sec.
To photograph the moon:
1. Use a tripod! A flat surface will only allow you to shoot straight, and shooting the moon means that you'll be shooting up and constantly re-adjusting the tripod as the moon moves throughout the night.
2. Use a shutter release cord, remote or the camera's self timer if you don't have one, so that you don't move the camera when pressing the shutter release during a long exposure.
3. Use a zoom lens and zoom in as much as you can to the moon. It's okay if it's not a super fancy lens, this was shot using a 15 year old $100 lens. Focus in on the craters and details on the moon.
4. ISO 1250- 1600, so that you can use as fast a shutter speed as you can without losing detail-the longer the shutter speed, the more chances you have the camera will shake even slightly in the wind, resulting in an out of focus photograph.
5. Aperture priority of f/5.6 since you are not worried about capturing any details other then the moon.
6. Bracket your exposure, meaning over expose and underexpose the photograph from what the camera is telling you. Generally the camera will overexpose the moon, so you'll get nothing but a white blob in the sky. Use the exposure compensation button (the +/- button below the shutter release) and change the exposure to -0.5, then -1.0, then -1.5 and so on, until you start seeing detail in the moon. You may go as far as -5.0 exposure compensation to get what you need.
7. Take a fair amount of photos and keep refocusing as the night progresses. The photographs may look focused on the camera's display, but you won't really see if they're completely in focus until you upload them onto your computer screen.
ISO 400 f/8 1/320 I took this picture for unity.
|
ISO 400 f/8 1/640 I took this picture for harmony.
|
ISO 400 f/8 1/2000 I took this picture for rhythm.
ISO 400 f/8 1/640 I took this picture for proportion
|
ISO 400 f/8 1/160 I took this for balance. This goes with balance
|
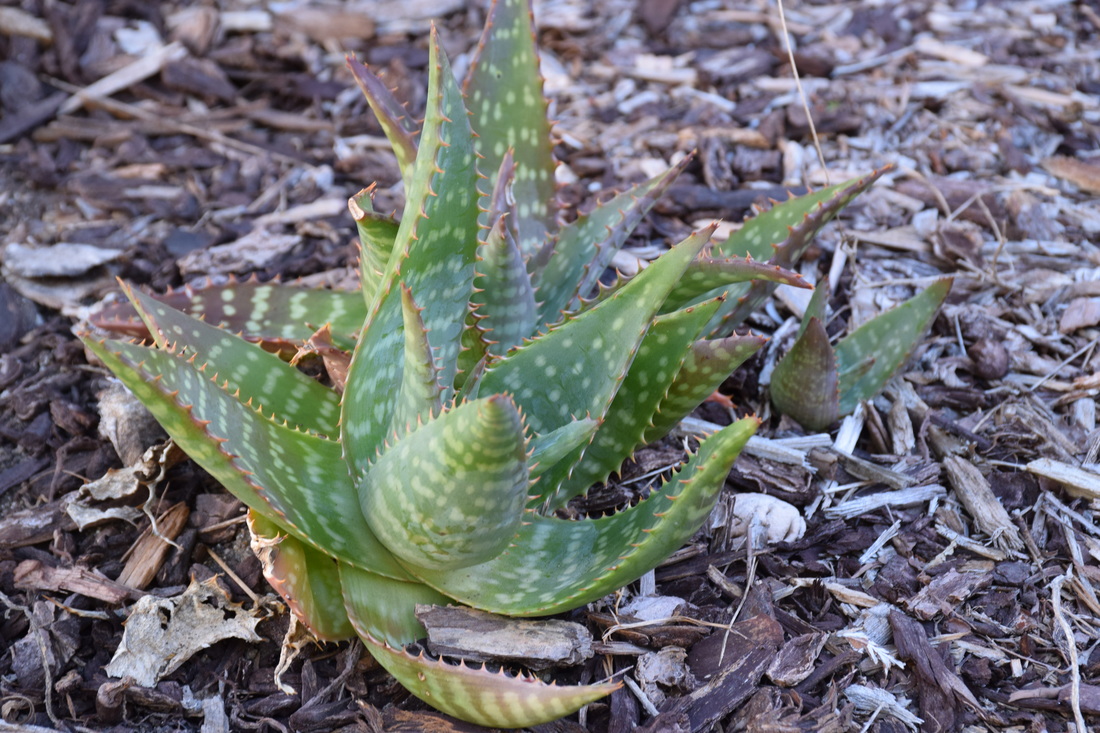
ISO 400 f/8 1/25 I took this for value. Because the ground is dark and it makes the green for the suculent pop.im not sure if this exactly goes with value but i like this picture since the dark of the ground make the green look bright
|
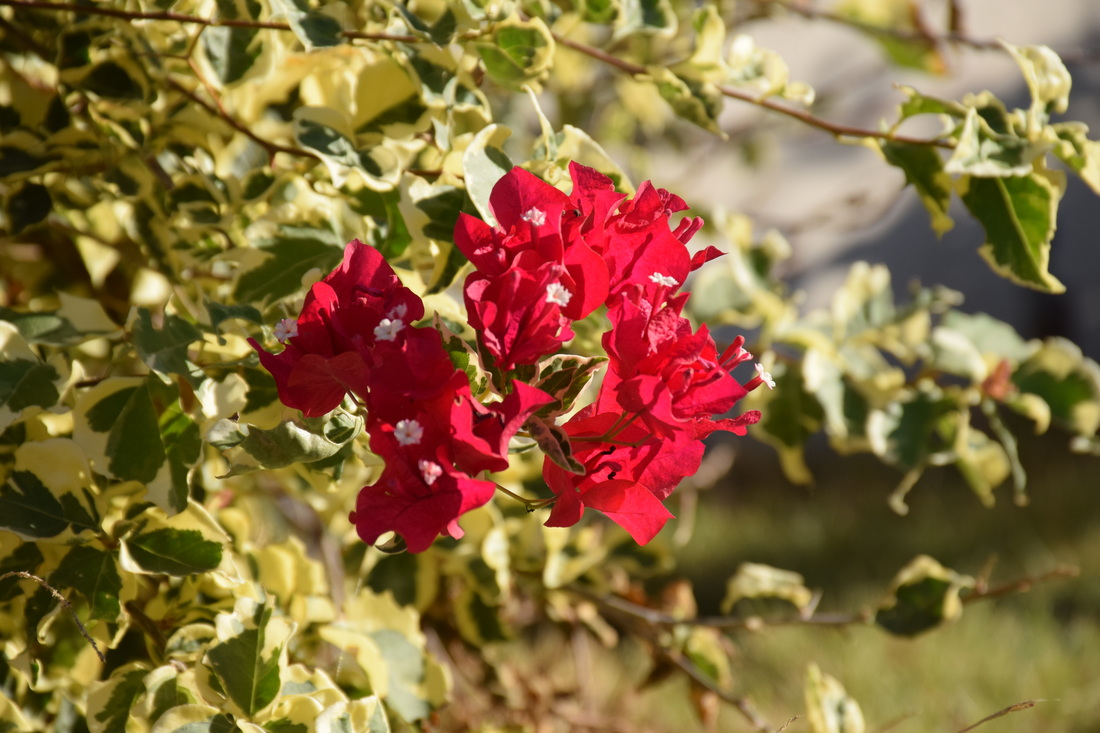
ISO 400 f/8 1/800 I took this picture for texture. Everything is so detailed in this picture its like you can almost feel the petals and leafs of the flowers. This picture was also easy to take because all you had to do in get close to it
|
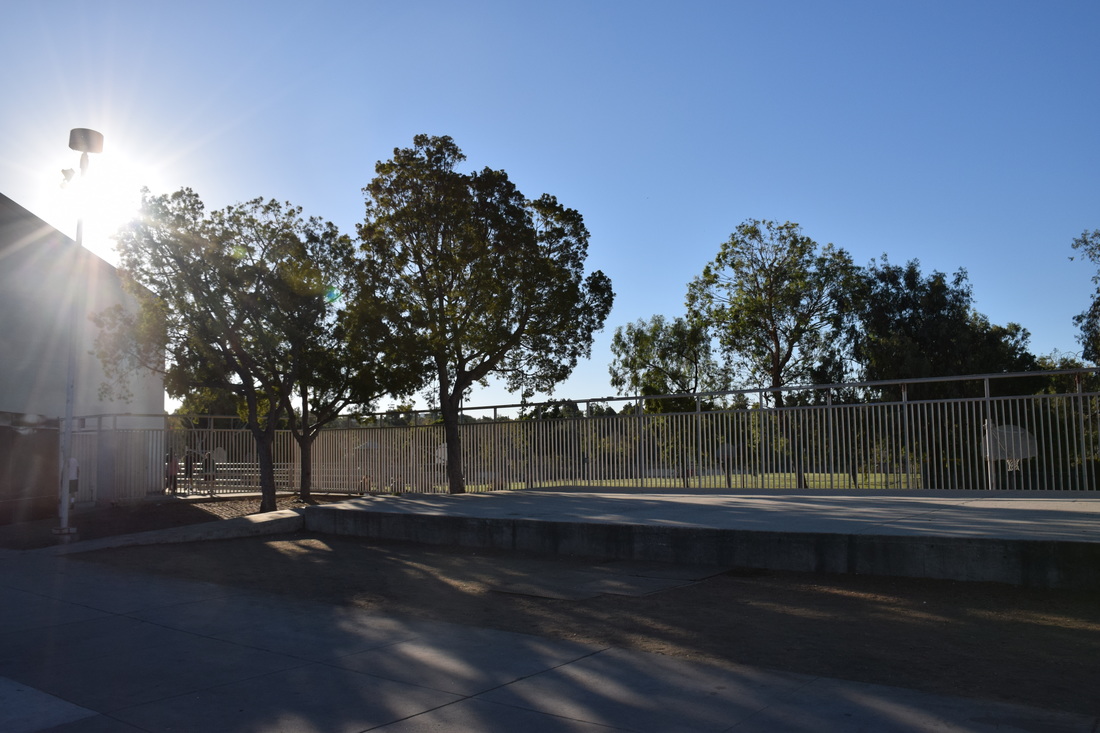
ISO f/8 1/2000 I took this picture for form. I tried to focus on the trees since they are three dimensional. This one was easy to find since all you had to find a place with shadow.
|
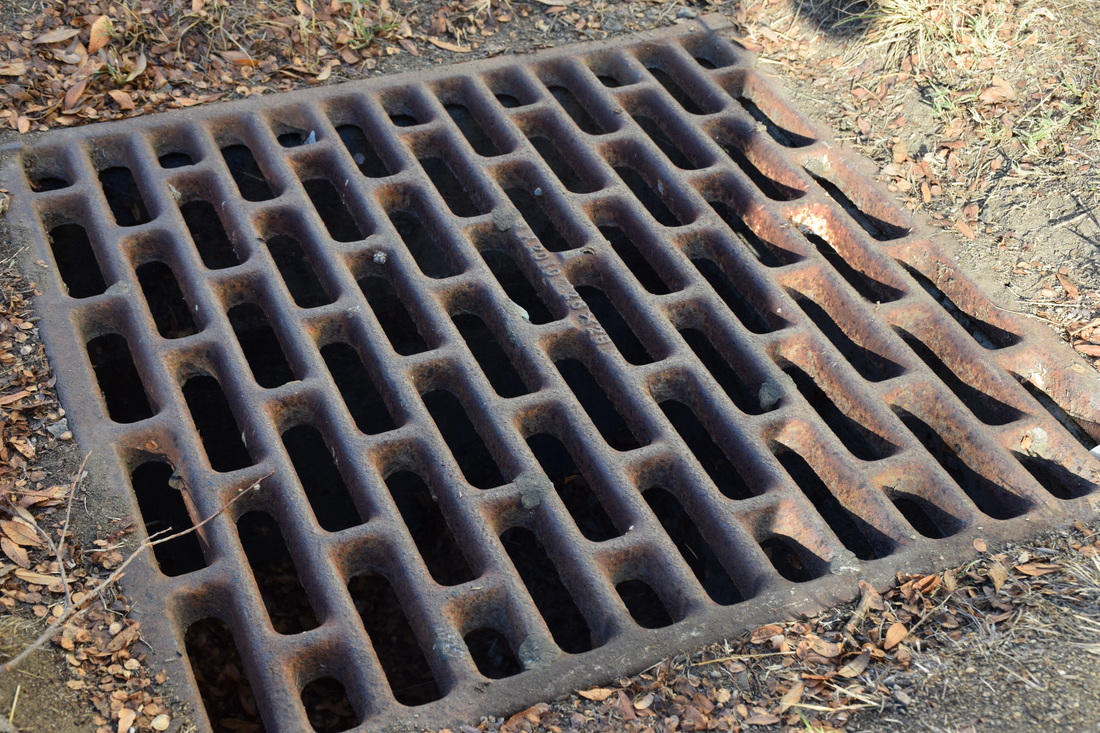
ISO 400 f/8 1/100 I took this picture for shape. The shapes shown here are inorganic because they are man made. I dont now if this goes with shape 100% but to me it made sense because its a shape but it not organic.
|
ISO 400 f/8 1/800
I took this one for color. I really like how the cool tones blue and green. I had a little trouble finding something for color but then i remembered cool and warm colors and the sky had cool colors.
|
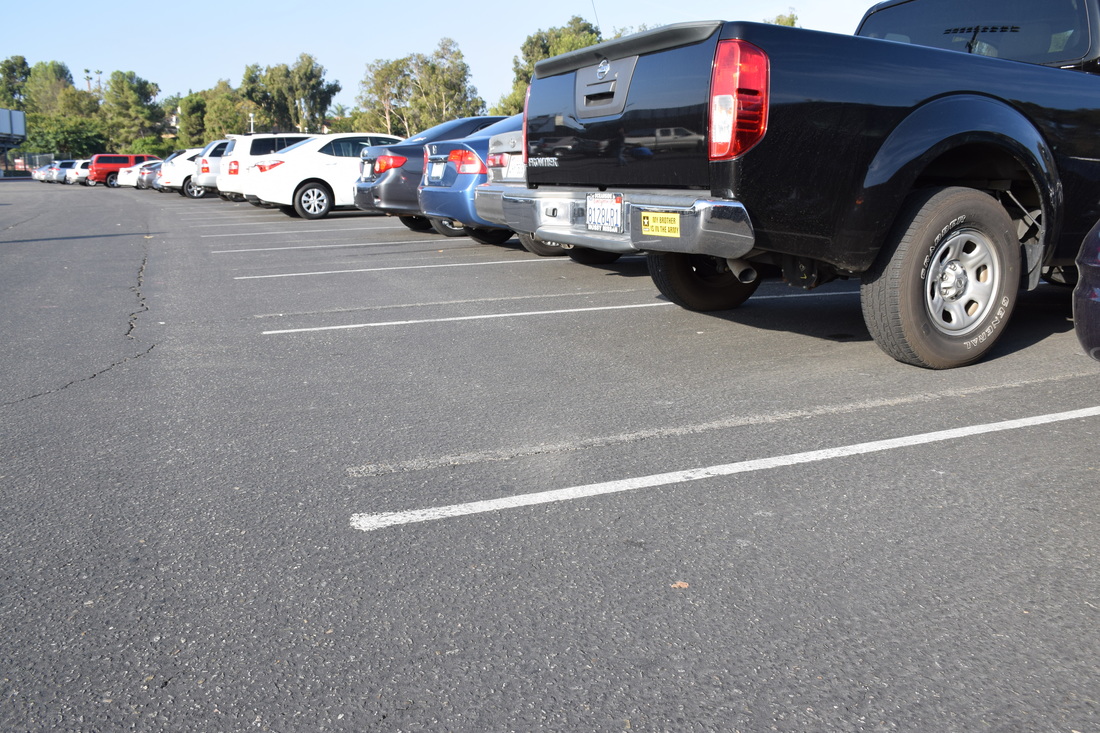
ISO 400 F/8 1/500
I took this for line. I really like how this picture turned out because they are in a perfect line and they look all the same .Taking a picture for line is the easiest one because you just have to look for a line or something thats in a line.
|
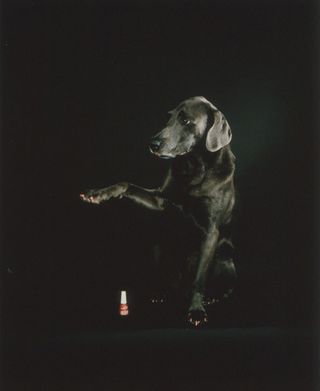
William Wegman, FeyRay, 1979 http://williamwegman.com/gallery/works.html This goes with variety because its not an everyday thing you see a dog painting their own nails.
|
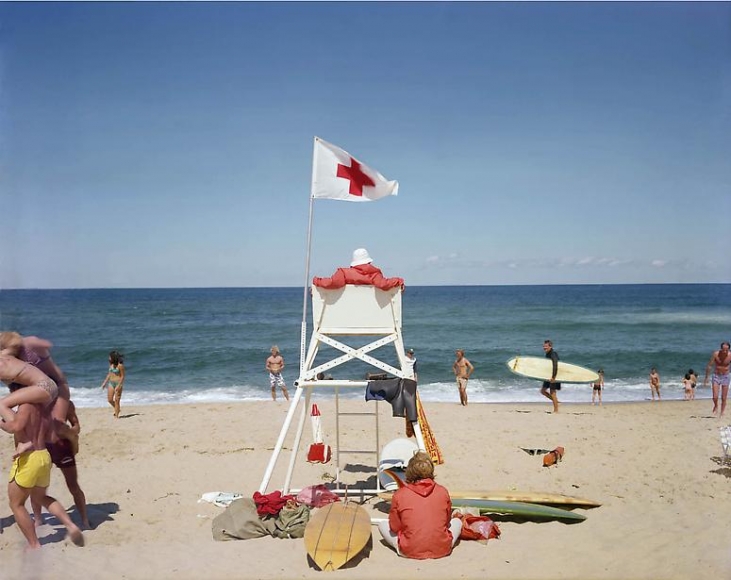
Joel Meyerowitz, Ballston Beach, 1976 http://www.houkgallery.com/artists/joel-meyerowitz/overlay?view=slider#6
this goes with harmony because the beach reminds us of a relaxing place.
|
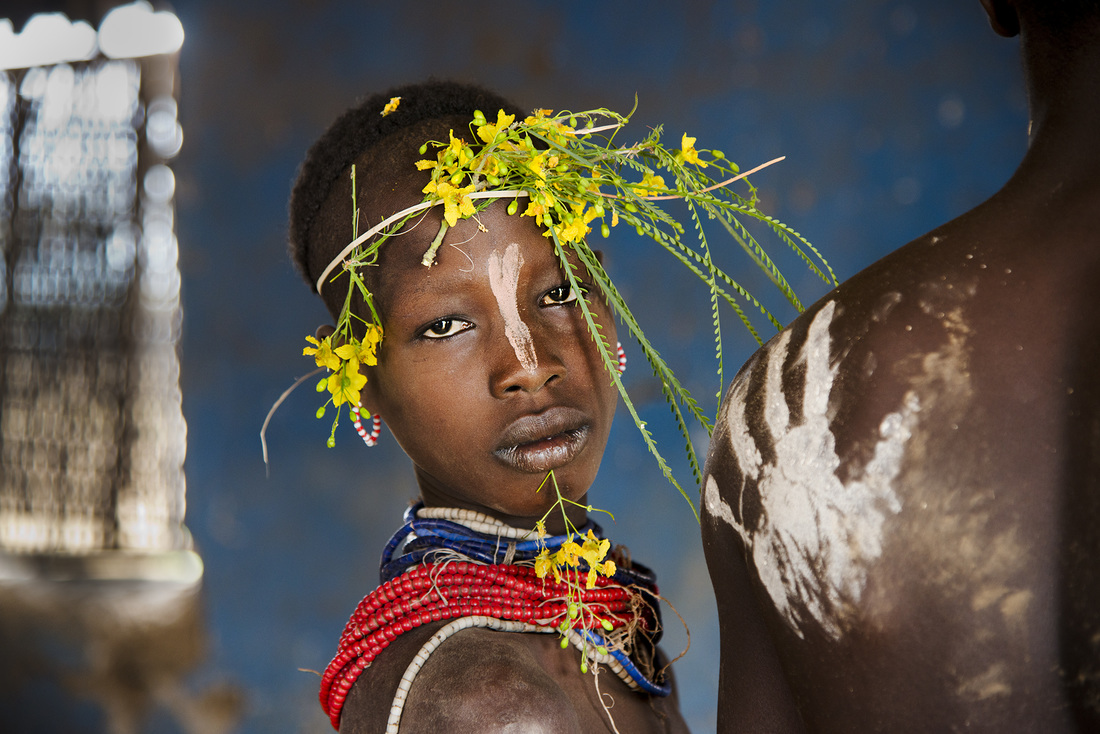
Steve Mccurry, Child adorned with flowers, 2012 http://stevemccurry.com/fine-art-prints
This goes with emphasis because the brightness for the flowers and necklaces attracts our eyes.
|
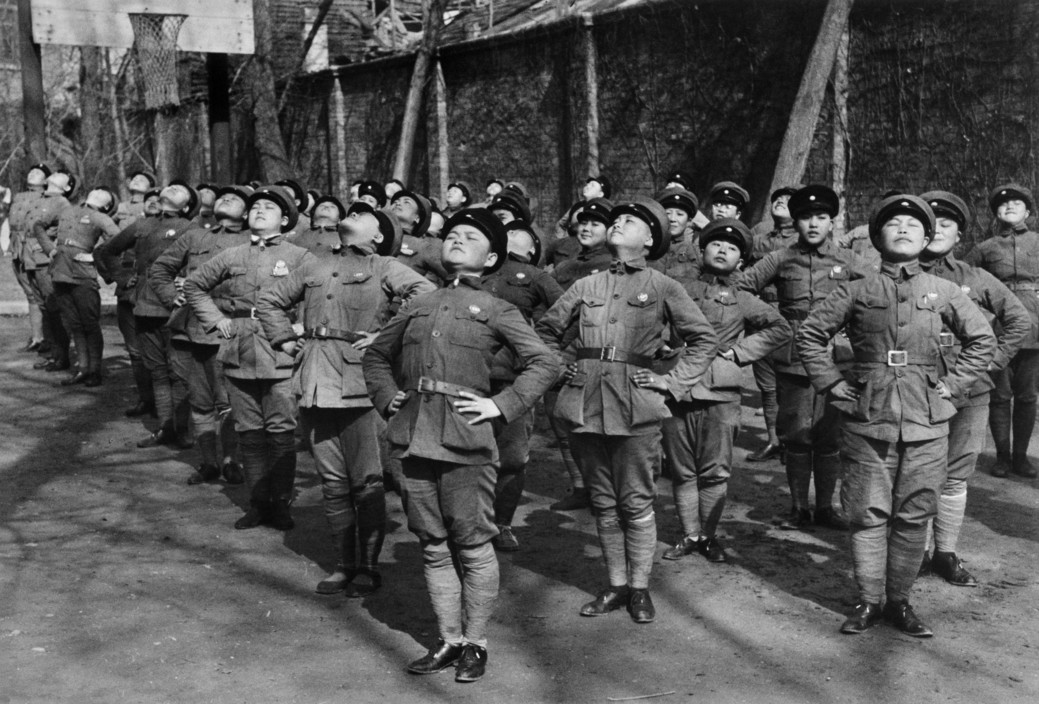
Robert Capa, CHINA, 1938
https://pro.magnumphotos.com/C.aspx?VP3=CMS3&VF=MAGO31_10_VForm&ERID=24KL535353
This goes with rhythm because the children were in formation because they were the army during those times
|
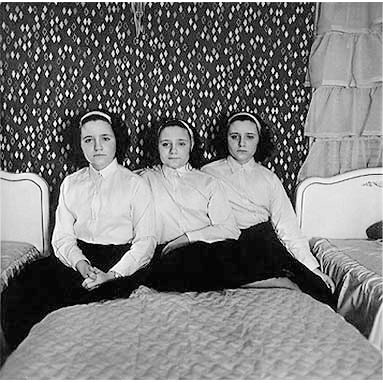
Diane Arbus, Triples in their room, 1963 http://www.atgetphotography.com/The-Photographers/Diane-Arbus.html
this goes with proportion because it shows us that they are all the same size.
|
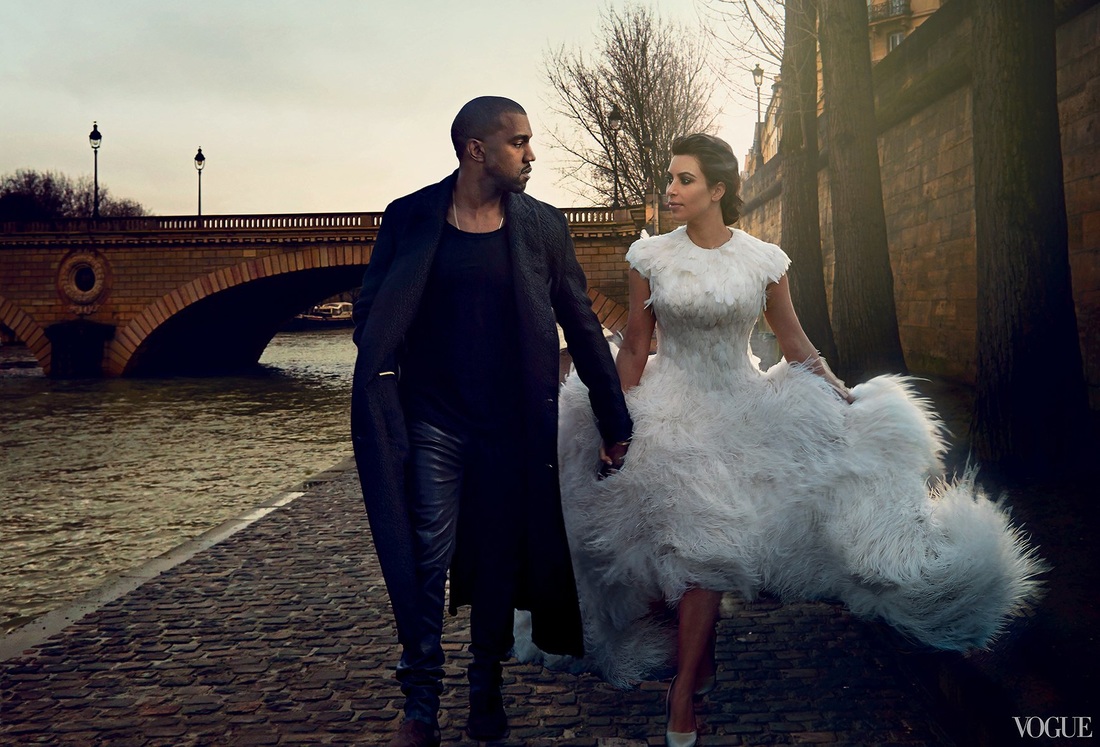
Annie Leibovitz, Vogue, 2015
www.vogue.com/tag/photographer/annie-leibovitz/
This goes with balance because some people would this is symmetrical because if you were to cut it there would be two people on each side but its not the same person so its asymmetrical.
|
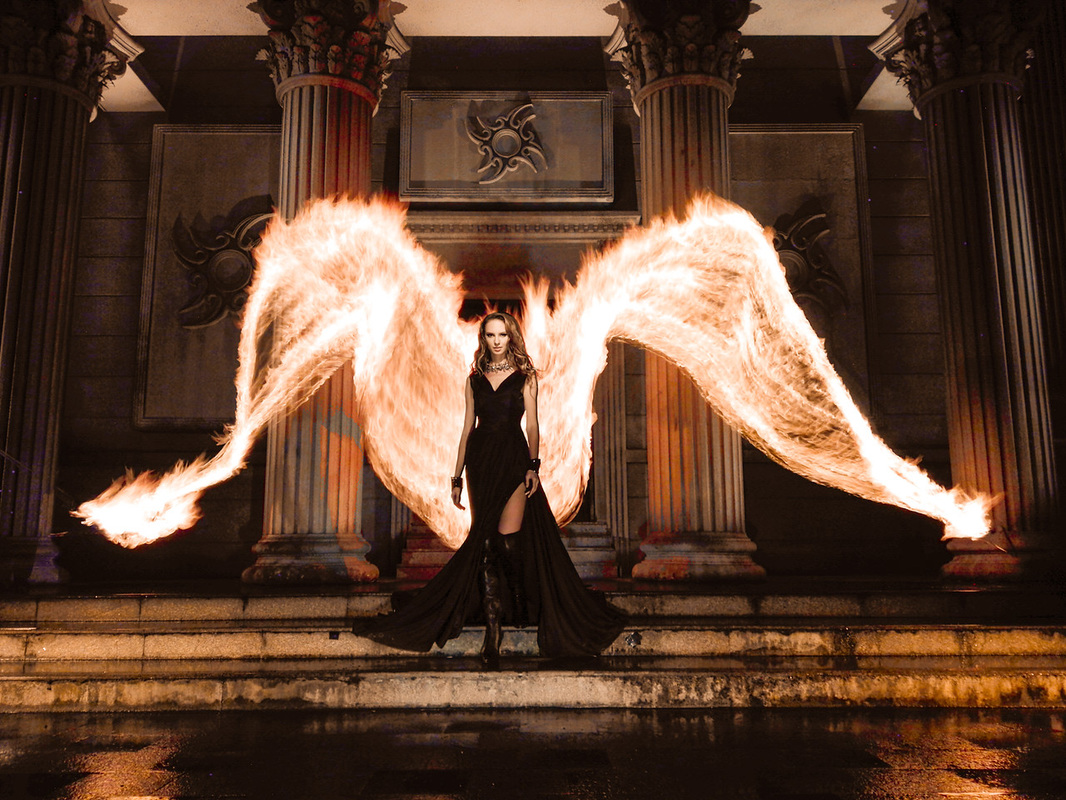
Ben Von Wong, Fire Angel, 2012
http://www.vonwong.com/
This goes with value because the light of the fire wings make everything look darker *Fun Fact: this was taken with a smartphone.*
|
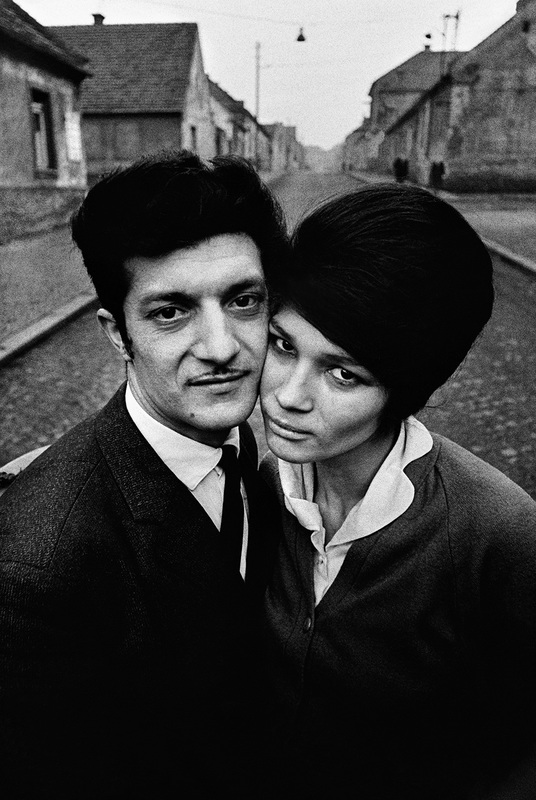
josef Koudelka, Bohemia, 1967,http://www.getty.edu/art/exhibitions/koudelka/
This goes with space because behind the people you can see all the empty space and depth of the road.
|
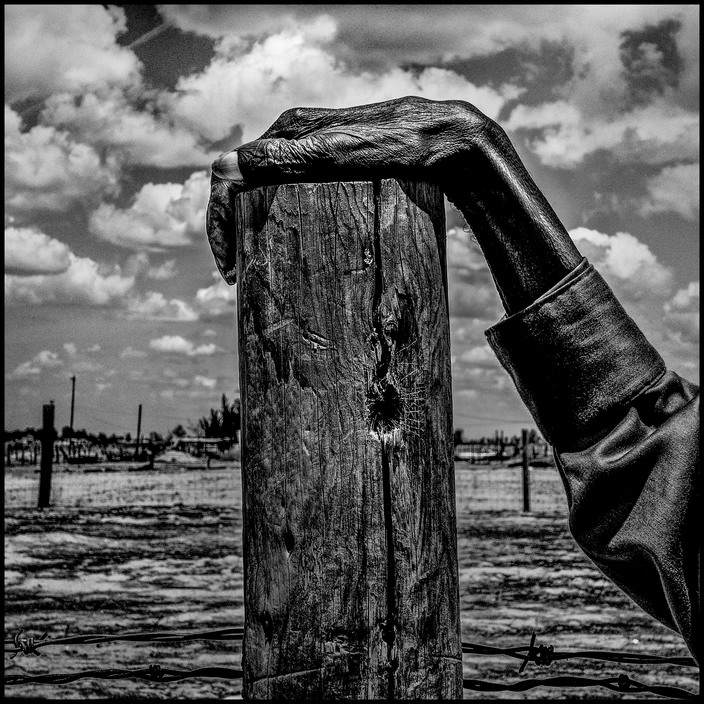
Matt Black, Fence post, 1970 http://pro.magnumphotos.com/C.aspx?VP3=CMS3&VF=MAGO31_10_VForm&ERID=2K1HRG66U2T0
This picture goes with texture because you can see all the detail in the old man's hand and its like you could almost feel it .
|
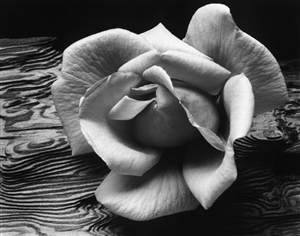
Ansel Adams, rose and driftwood, 1932
http://www.coolantarctica.com/Shop/ansel_adams/driftwood_rose.ph This goes with form because Adams did a good good showing shading and highlight with this rose it looks very detailed
|
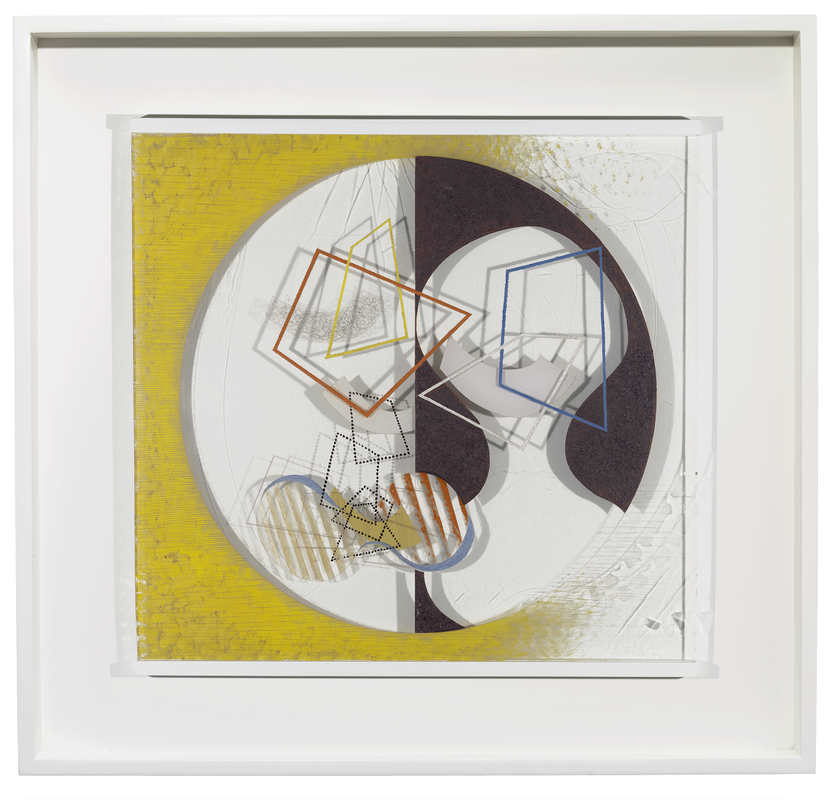
László Moholy-Nagy, Space Modulator, 1939–45 https://www.guggenheim.org/artwork/2987 This goes with shape because he uses a lot of organic shapes which means the are irregular and nature made.
|

Sandy Skoglund, Spirituality in the flesh, 1992
http://www.sandyskoglund.com/pages/imagelist/imagelist%20home.html This goes with color because she uses a lot of orange which is an analogous color and then the blue is a cool color.
|
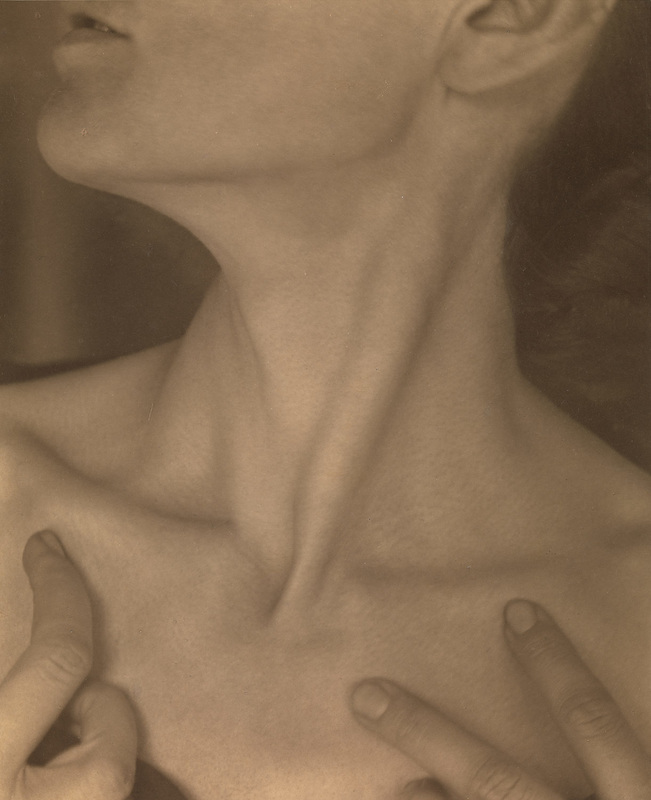
Alfred Stieglitz, Georgia O'Keeffe — Neck, 1921
http://www.metmuseum.org/toah/works-of-art/1997.61.19/
This goes this line because the line the bones make when the model turns pop out and make our eyes focus on them.
|
Elements of Art
- The “building block” of design
- All good design will have one or more of these elements; line, color, shape, form, texture, space, and value
- The presentation aims to show you some illustrations of these elements through photography.
- Line is one- dimensional and can vary in width, direction, and length. Lines also can define the edges of a form. Lines can b e horizontal, vertical or diagonal , straight or curved, thick or thin.Lines lead your eyes.
- Color has three characteristics :hue(red, yellow,green), value (how light or dark it is), and intensity(how bright or dull it is). Color can also be described as warm (red,yellow), or cool(blue, green).
- Monochromatic-one color plus its tints and shades
- Shape is two dimensional , with a height and width.
- Organic shape: a shape made by nature not completely.
- Form is three dimensional, has height and width and depth.
- Photographers emphasize form by the use of highlight and shadows.
- The surface quality of an object that we sense through touch. All object have a physical texture.
- In a 2 dimensional work, texture gives a visual sense of how an object depicted would feel in real life if touch
- Real space is a three dimensional. Space is a work of act refers to a feeling of depth of three dimension. It can also refer to an artist use of the area around the picture plane.
- Positive : the space occupied by the primary object.
- Negative space: the space around the primary object.
- Value is the lightness or darkness of a surface. It is frequently used when talking about shading, but is also important in the study of color.
- The principal of art are the rules or guidelines of art. Used to organize or arrange the structural element of design. Principal are balance, proportion, rhythm, emphasis, harmony, variety, and unity
- Is similar to our physical sense of balance. Itis how the artist uses opposing forces in a composition that result in a composition that results in visual stability.
- Proportion relates to the relative size and scale of the various elements.
- Is an artwork indicates movement by the repetition of elements. Rhythm can make an artwork seem active
- Is to make one part of an artwork dominant over the other parts. It attracts the viewer’s eyes to a place of special importance in an artworks.
- Is the pleasing quality achieved by different elements of a composition interacting to form a whole.
- Differences achieved by opposing, contrasting, changing, elaborating, or diversifying elements in a composition to add individualism and interest.
- Is the result of bringing the elements of art into the appropriate ratio between harmony and variety to achieve a sense of oneness. It is the sense that everything works together and looks like it fits.
This picture was taken by Rochelle Ponce. IOS 1600 f/3.8 1/1000
|
ISO 1600 f/3.8 1/1000
|
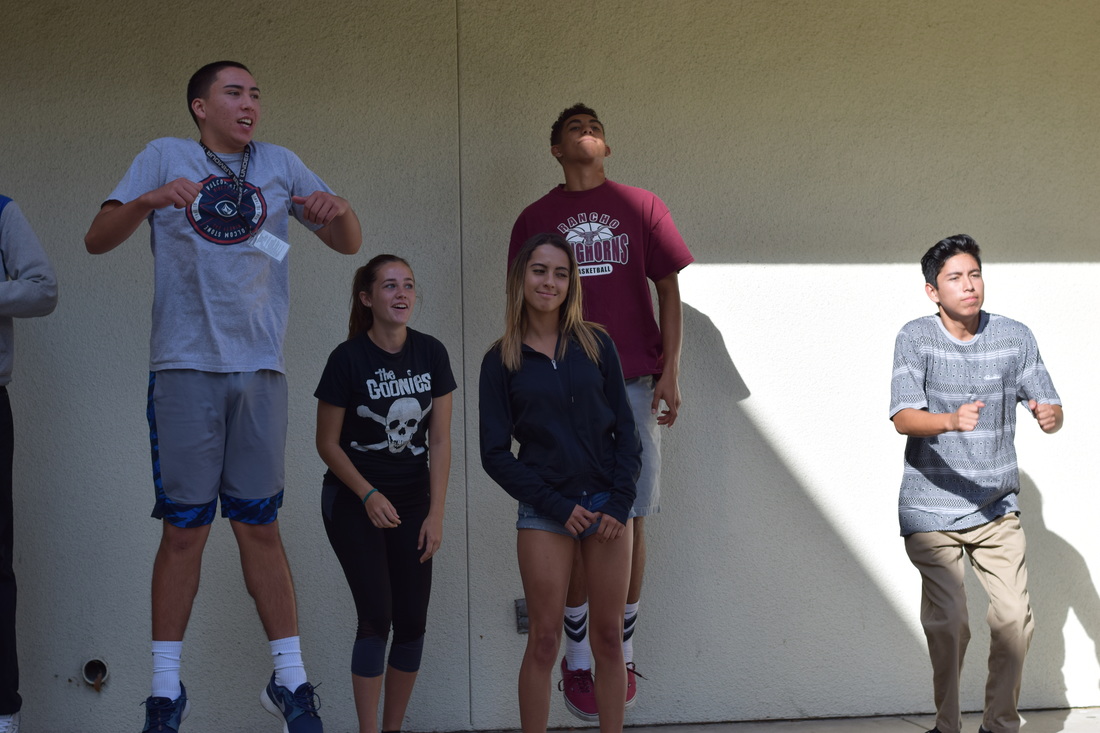
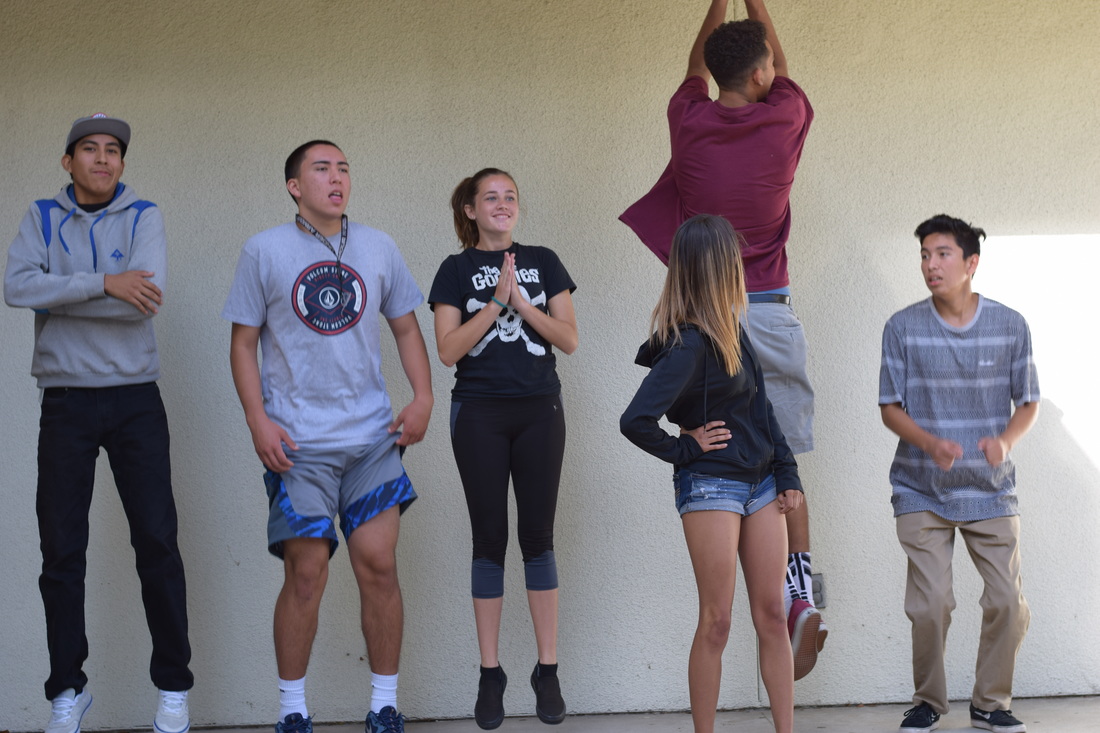
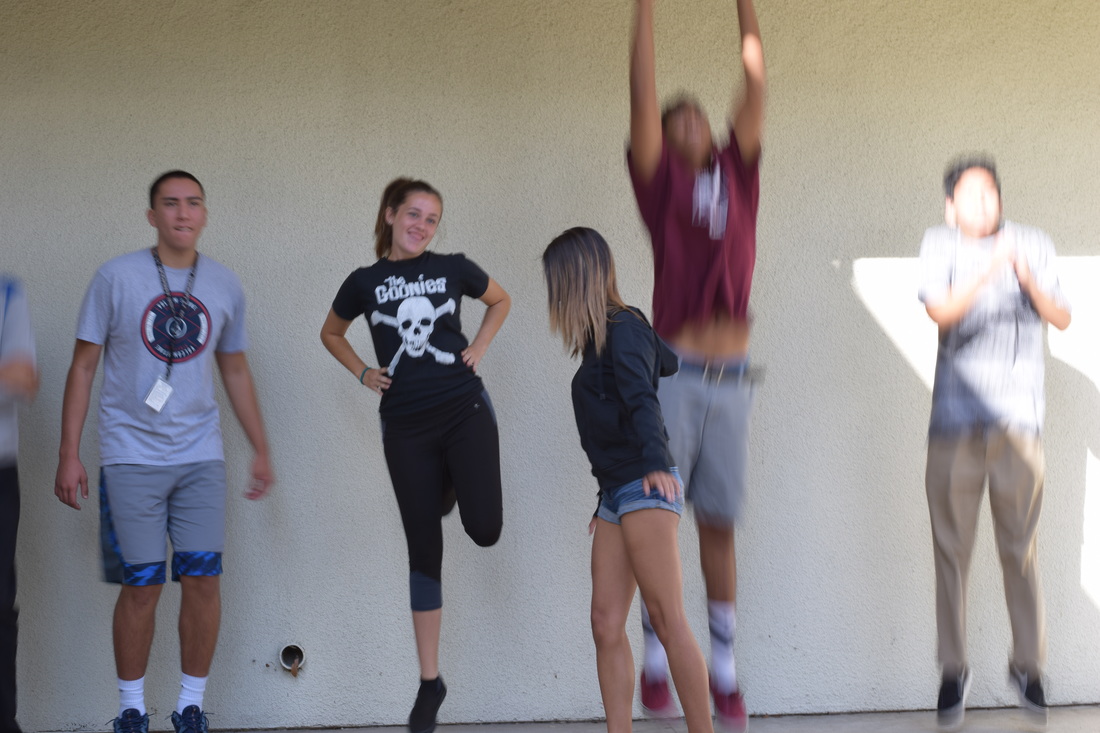
I liked learning about fast shutter speed because we stopped time while doing things that would usually take 5 seconds. other things you can use fast shutter speed is probably car race, running races, or swimming contests, puppies/dogs running would also look cute.
By: Salma Hernandez
Respect Yourself
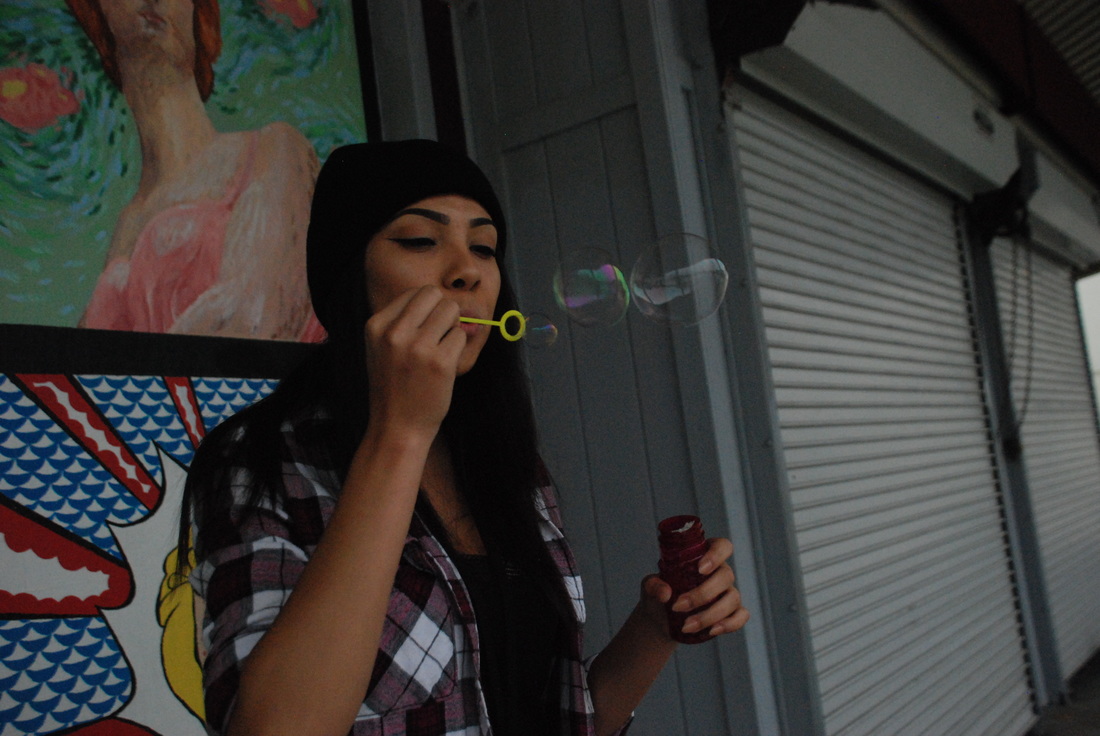
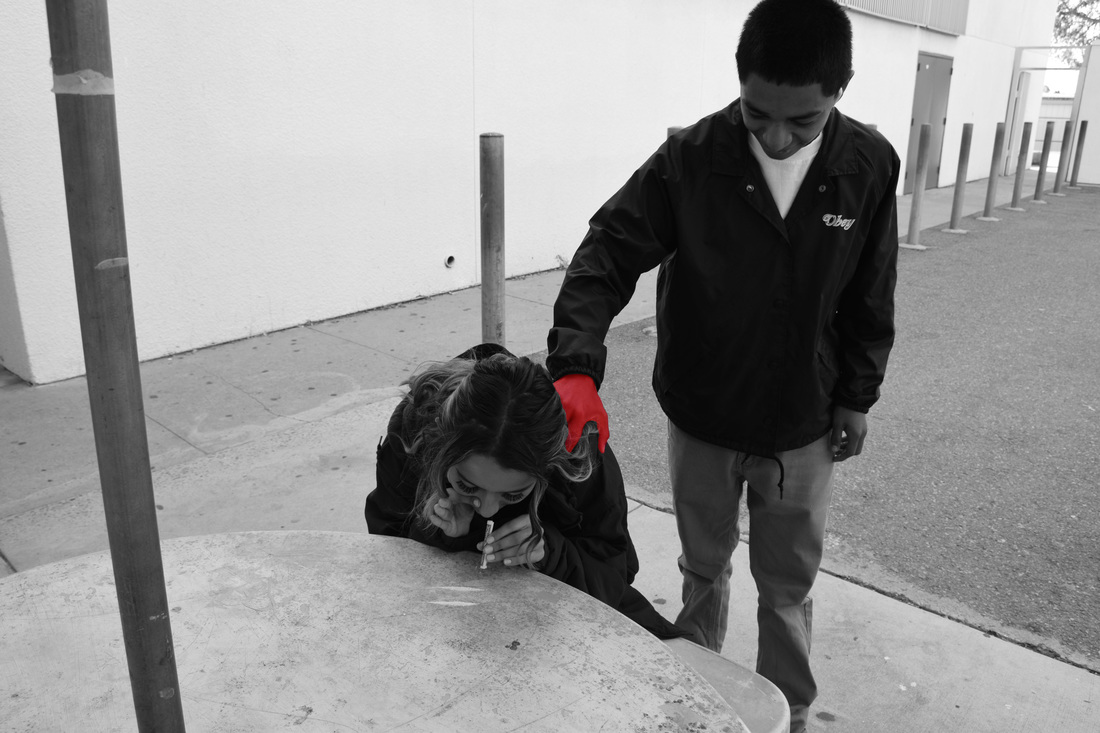
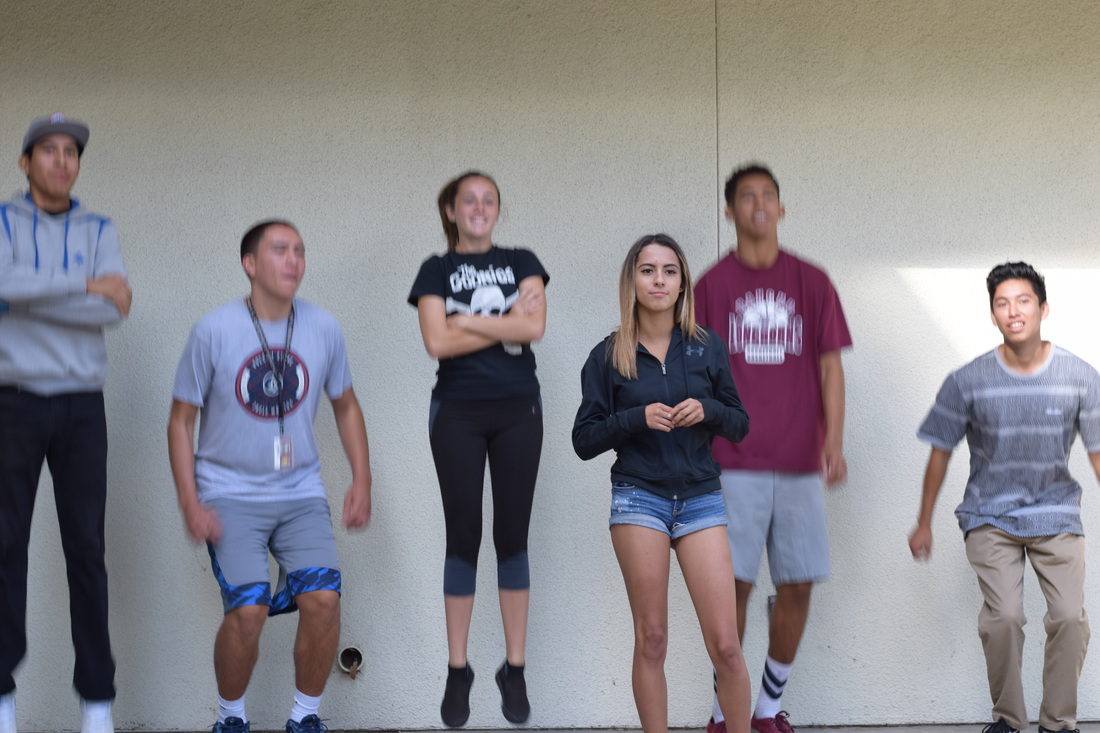
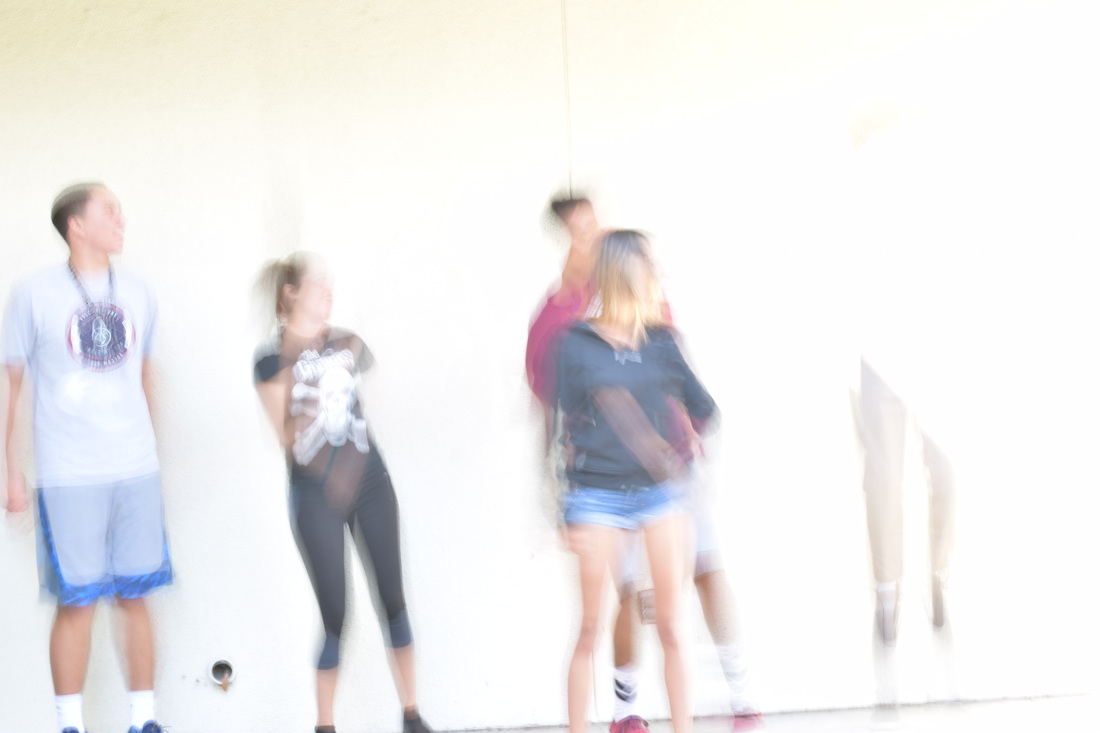
The meaning of “respecting yourself” is knowing yourself worth and surrounding yourself with people that want the best and care for you. In my picture there’s a girl that was turned to drugs to escape from her problems and not caring what the outcome is going to be for her from doing these addictive drugs. Behind her is a one of her friends that is telling her to stop and trying to make her realize that drugs aren’t worth dying for. The red in his hand symbolizes “red ribbon week”. Red Ribbon Week is a week dedicated to pledging to yourself to never touch a drug or alcohol. Its also taught to kids at a young age to not let drugs control their lives and maybe even end it.
Respect Yourself
The meaning of “respecting yourself” is knowing yourself worth and surrounding yourself with people that want the best and care for you. In my picture there’s a girl that was turned to drugs to escape from her problems and not caring what the outcome is going to be for her from doing these addictive drugs. Behind her is a one of her friends that is telling her to stop and trying to make her realize that drugs aren’t worth dying for. The red in his hand symbolizes “red ribbon week”. Red Ribbon Week is a week dedicated to pledging to yourself to never touch a drug or alcohol. Its also taught to kids at a young age to not let drugs control their lives and maybe even end it.
IOS 100 @f/5.6 Shutter Speed:8.0
|

IOS 100 @f/5.6 Shutter speed:8.0
|
IOS 100 @f/5.6 Shutter speed:8.0
|

IOS 100 @f5.6 Shutter speed: 8.0
|
IOS 100 @f/5.6 Shutter speed: 8.0
|
IOS 100 @f/5.6 Shutter speed: 8.0
|
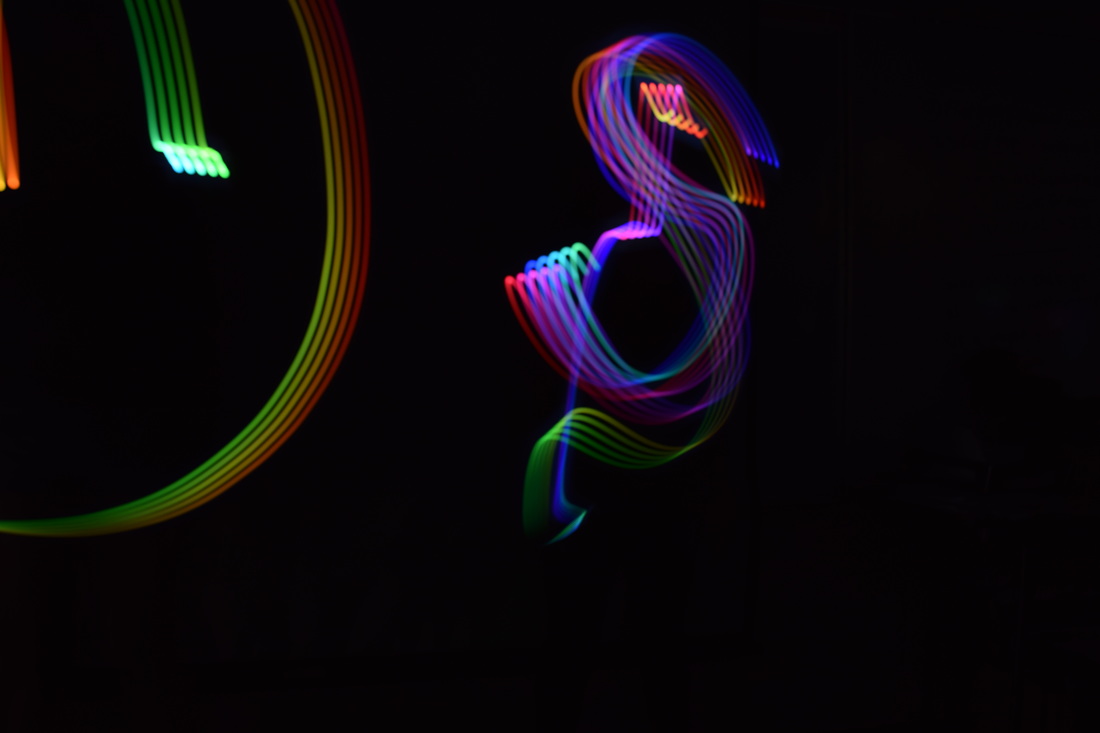
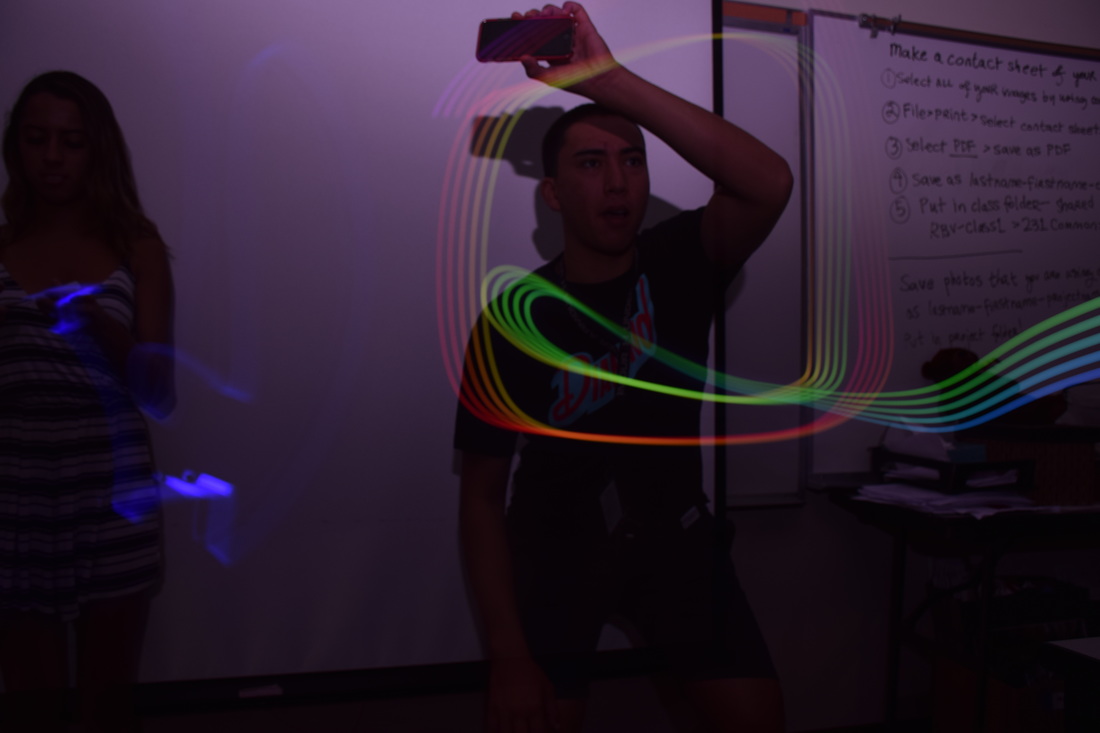
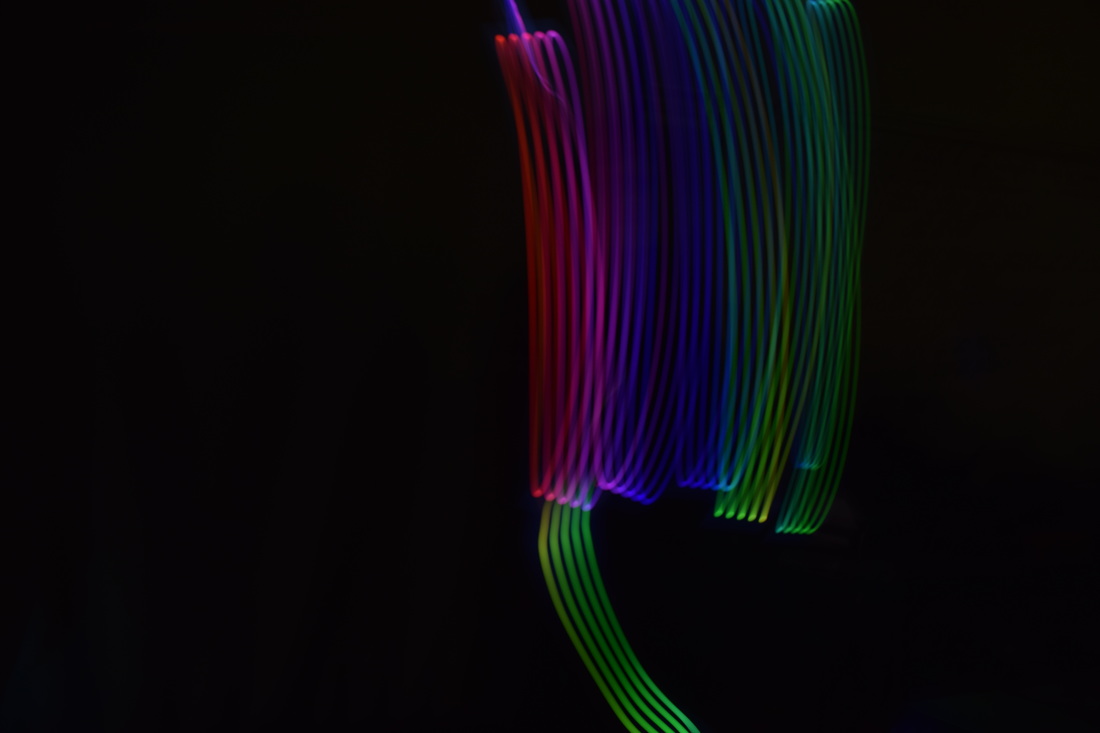
Light painting- I took these pictures on a tripod ,in a dark room. My partner and use the app Mylightpaint on our iPhones . We tried to do letters and my partner tried to go the disney channel logo like they do on the commercial.It was hard to do 4 people at once because some of there light would go on our side and ruin our picture. I learned that its really easy to do this activity at home with friends.
IOS 100 f/4 @1/1000
IOS 100 f/3.3 @1/250
IOS 100 f/11 @1/30
|
IOS 100 f/5.6 @1/60
IOS 100 f/16 @1/3
|
Cyanotype formula:
Step 1) Make solutions A "25 grams of ferric ammonium citrate added too 100 ml water" and B "10 grams of potassium ferricyanide added to 100 ml water".
Step 2) In a dark from with no sun light mix equal parts A and B . The solution is now light sensitive.
Step 3) In the same dark room coat a thin layer of the solution on a white piece of paper
Step 4) Then blow dry the paper until it is completely dry, the paper
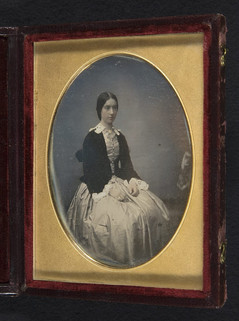
dagguerrotype
|

cyanotype
|
Daguerrotype: people can finally see how their dead relatives looked liked before they passed away. They also lasted a long time.
- Louis Daguerre invented the 'Daguerreotype' in 1839.
- The process for the daguerreotype starts with a silver-plated copper plate and the chemicals used are iodine and bromine to sensitize.
- John Hershel invented the cyanotype in 1842.
- The process for making a cyanotype starts with using blue-cyan dye and uses chemicals such as ammonium iron, citrate, and potassium ferricyanide.
Toy story:opposites attract

This is David. David is the most popular guy at Rancho Buena Vista High school. Every girl wanted him and every guy wanted to be him.
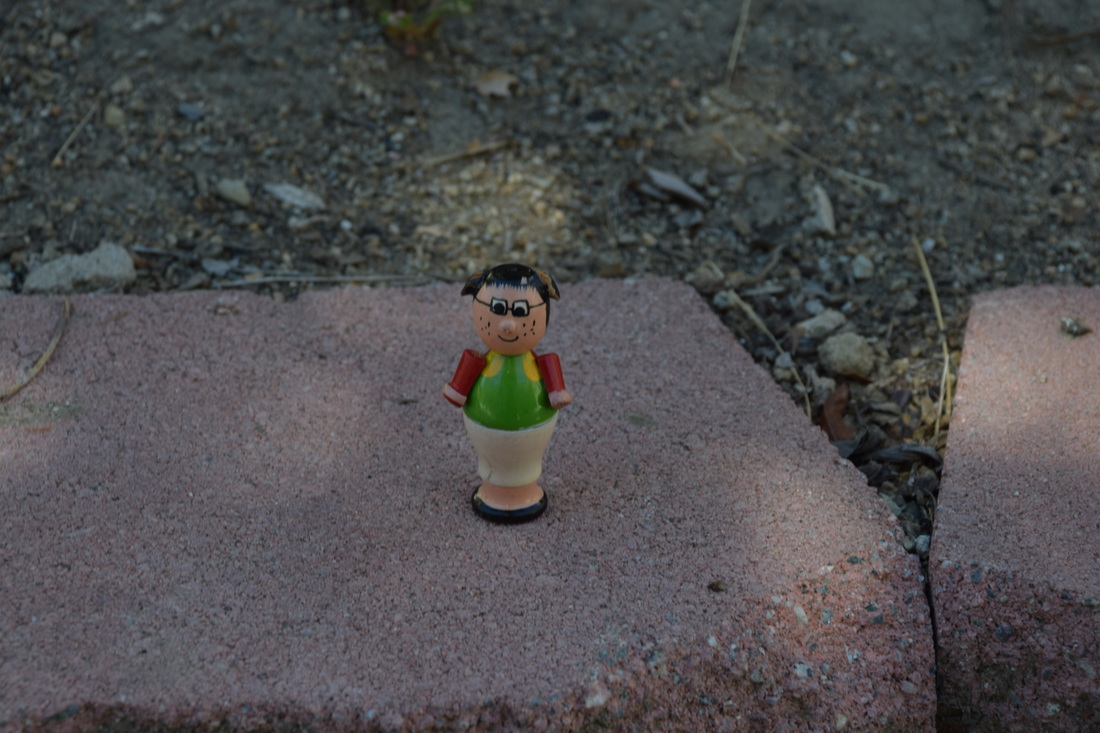
This is Selena. She is not really noticed by anyone but she doesn't mind because he doesn't like to be the center on attention. she always alone because she doesn't have many friends.
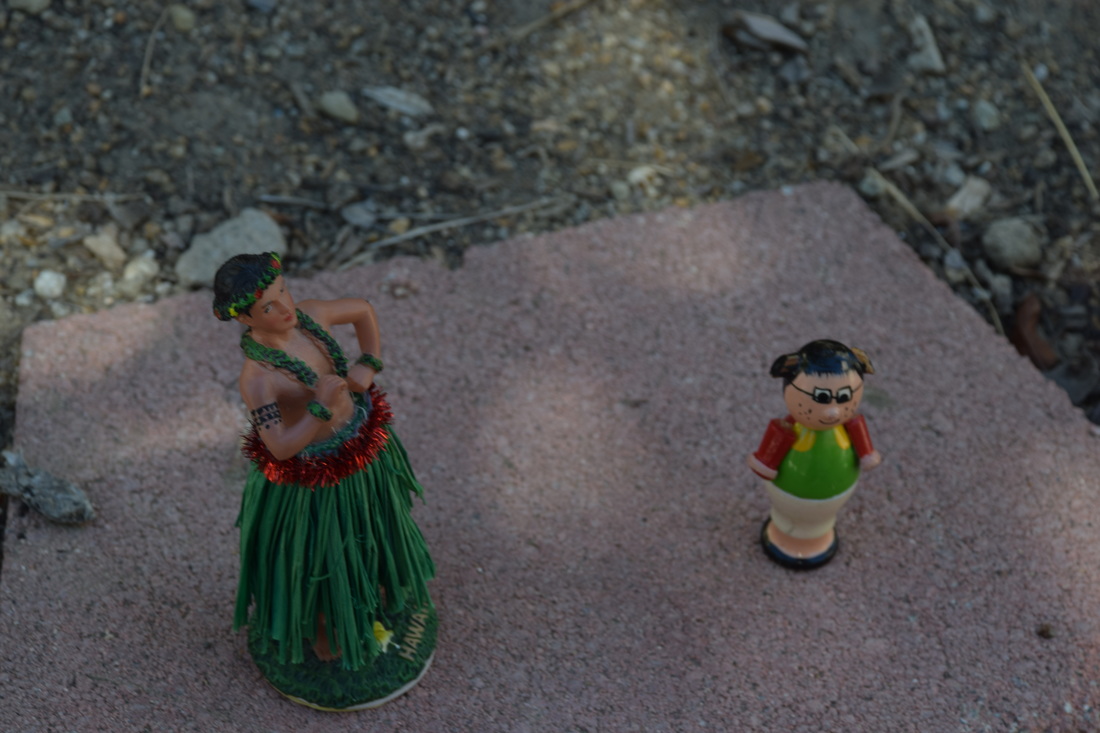
David and Selena had photography class together.Today they were working on a project and mrs. Moncure paired them together.
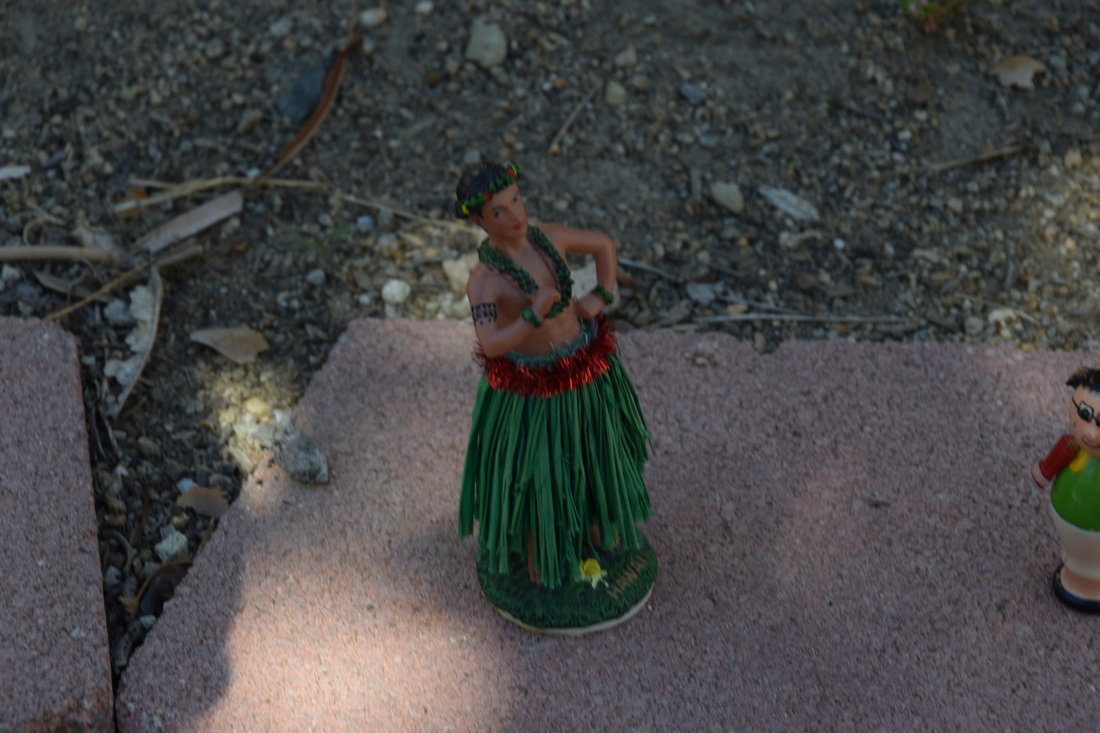
Davids friends laughed at him and made jokes because he had to work with the weird girl. David dint mind that he had to work with her but laughed with them anyway.
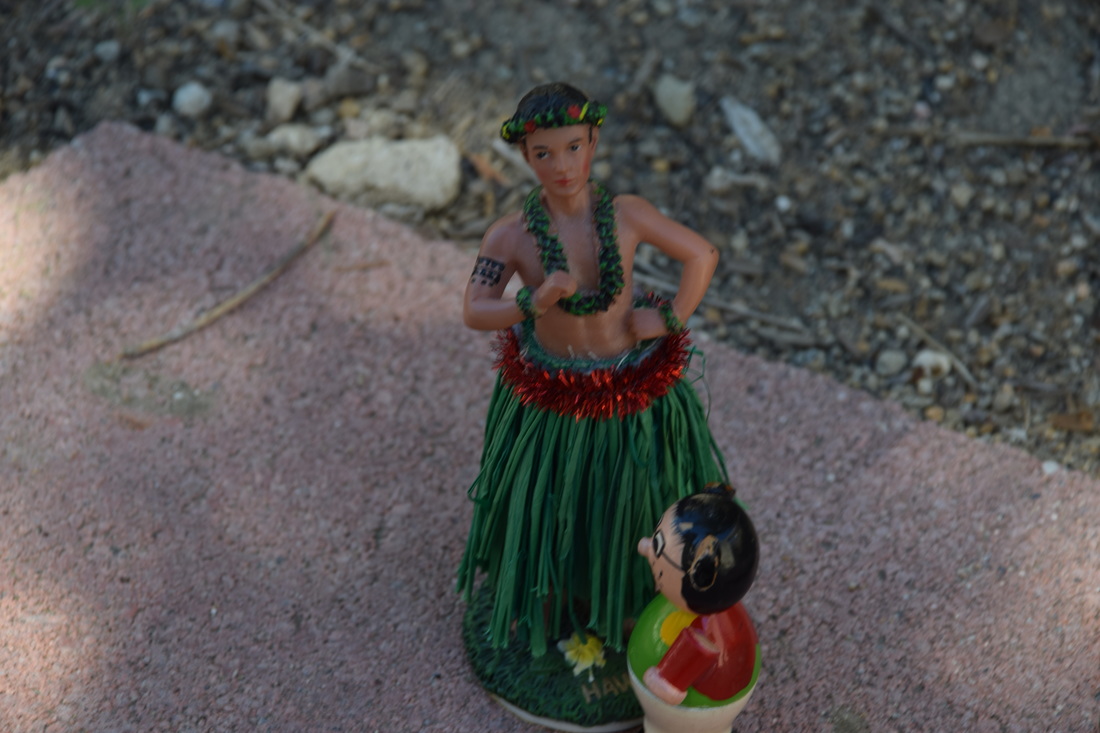
Selena was very shy and barely had the guts so say "hi" to him so David did most of the talking. He made her laugh and she began to open more and ended up getting to know each other
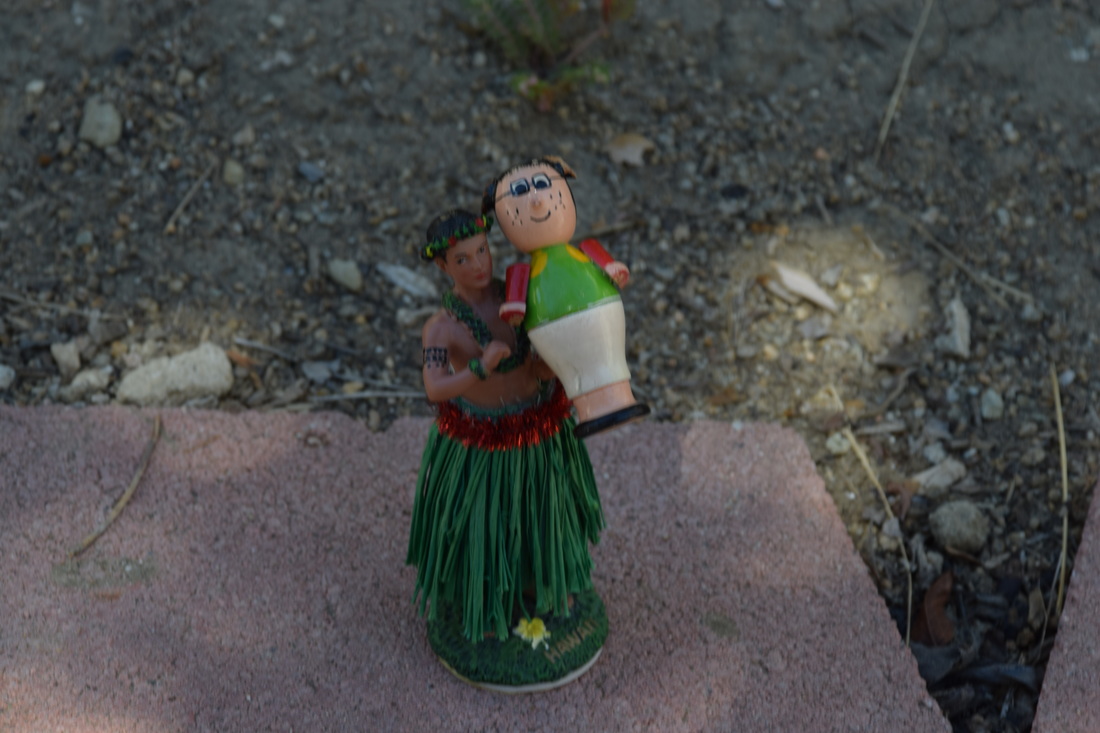
David and selena began to go out even though people didn't like it and made rude comments about them. David and selena had deep feelings for each other so no one could break them apart
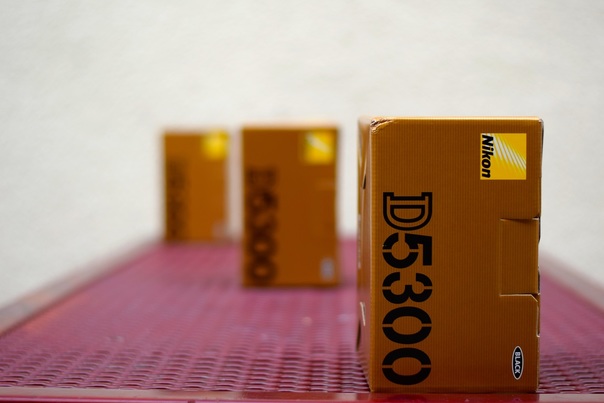
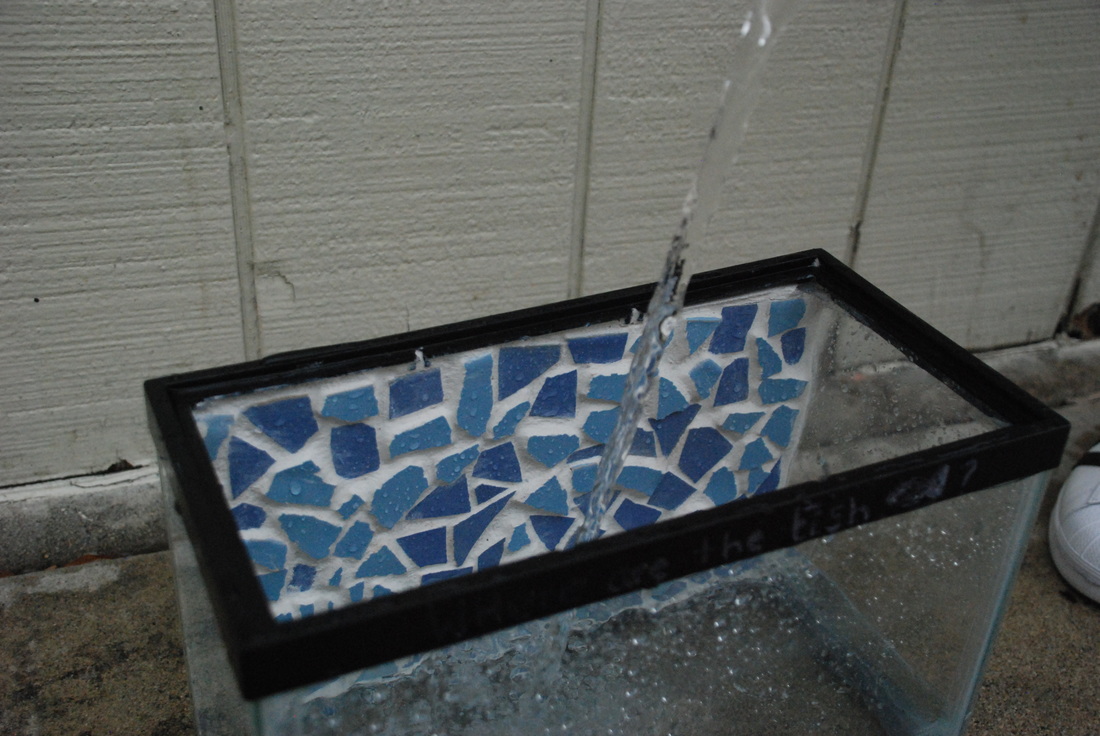
I used aperture f-1.8 to take this photo and i focused on the first box.
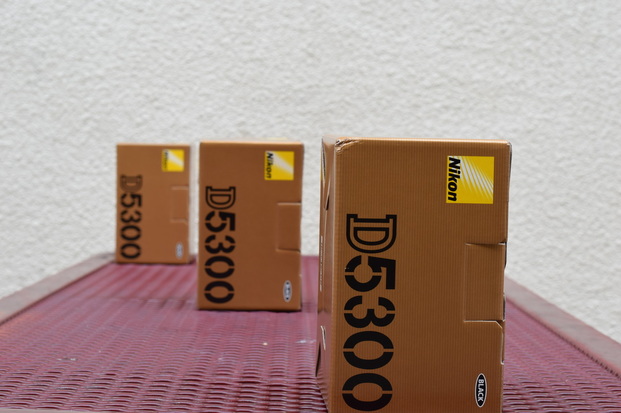
i use aperture 8 and I focused on all the boxes.
DSLR
- DSLR- stands for “Digital Single Lens Reflex”.
- A digital camera that uses mirrors to direct light from the lens to the viewfinder, which is a hole on the back of the camera that you look through to see what you are taking a picture of.
- Exposure is the amount of light collected by the sensor in your camera during a single picture
- If the shot is exposure too long the photograph will be washed out
- If the shot is exposed too short the photograph will appear too dark
- Almost all camera today have light meters which measure the light in the given shot and set an ideal exposure
- The three primary control your camera uses for exposure are aperture, shutter speed, and ISO
- Simply put, a[erture is a hole within a lens, through which light travels into the camera body
- It is easier to understand the concept if you just think about our eyes.
- In photography, aperture is exposure is expressed in f-numbers (f/5.6). These f-numbers that are known as f-stops are a way of describing the size of the aperture, or how open or closed the aperture is. .
- A smaller f-stop means a larger aperture while a larger f-stop means a smaller aperture. For example, f/1.4 is larger than f/2.0 and much larger than f/8.0
- Small aperture(high f/numbers ie f/22) increase the depth of field, bringing both the main subject and background into focus
- Larger aperture(low f/numbers ie f/2.8) soften background details.
- Shutter speed, also known as “exposure time” stands for the length of time a camera shutter is open to exposure light into the camera sensor
- If the shutter speed is fast, it can help to freeze action completely
- Shutter speed are typically measured in fractions of a second when they are under a second
- The slowest shutter speed for handheld photography is 1/60 Anything lower then the should either be on a tripod of on a straight,solid surface
- ISO is the level of sensitivity of your camera to available light.
- The lower the ISO number the less sensitive itis to the light while a higher ISO number increases the sensitivity of your camera.
- M-manual
- A-aperture priority
- S-shutter priority
- P-camera sets shutter speed and aperture
- Have the camera strap around your neck at all times and hold the camera by the lens and hand grip if possible-treat with care!
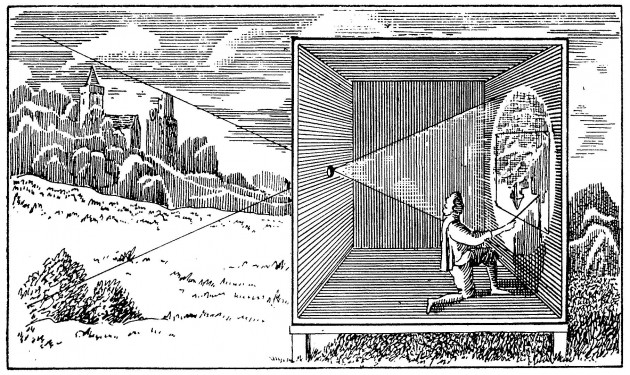
Camera obsura is when your in a darkroom and u have curtains on the window and rip a little hole and then the view from outside will be shown upside on the wall
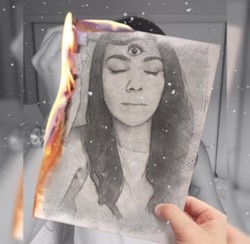
I like the whole idea of the third eye and closing your eyes and opening your eye to see things in a deeper perspective.I used photo lab the get the app photoshop mix to edit another eye on my face and photo lab the make myself look like a drawing.
Surreal portrait
"third eye"
"third eye"
